Can You Get iTunes on Chromebooks: Ultimate Guide
“Can you get iTunes on Chromebooks? Is this possible to do? If it is, then how can I do it?”
iTunes is one of the most used and popular platforms as there are lots of benefits it can really offer to its users. People can download songs from iTunes. From being a media player to a file or media organizer, we can’t blame people for continuously loving the app.
The same with iTunes, using Chromebooks is also popular. However, some Chromebook users are surely bothered by how they can get iTunes on their Chromebooks.
Unfortunately, we have to mention that the answer to the “Can you get iTunes on Chromebooks?” query is negative because iTunes is not natively supported by Chromebooks. But you don’t have to be sad about it!
As always, we can apply workarounds to make things work! It is a known fact that iTunes is supported by the Apple ecosystem and can also be installed on Linux and Windows devices. Talking about how to do it on Chromebooks would then be a separate discussion.
Let’s now start finding out how you can get iTunes on Chromebooks seamlessly!
Article Content Part 1: Can You Get iTunes on Chromebooks: The Different Ways to GetPart 2: The Best Way to Get iTunes and Apple Music Songs on ChromebookPart 3: Summary
Part 1: Can You Get iTunes on Chromebooks: The Different Ways to Get
As we have also mentioned in the introduction part, though the answer to the “Can you get iTunes on Chromebooks?” question is a “No”, we can always resort to finding out ways to get the dilemma addressed. In this case, we’ve got 4 workarounds that we’ll share in this post.
Are you too excited to learn how you can get iTunes on Chromebooks? Well then, keep on reading!
Method #1. Use “Wine” to Access iTunes on Your Chromebook
Actually, ChromeOS was developed with Linux OS as a basis. With the help of “Wine”, it is easy for people to install Windows apps on their Linux devices (including iTunes).
Thus, if we are to take advantage of it, we can then get iTunes running on Chromebook! Of course, make sure that you have an active iTunes account before you go ahead and read the steps mentioned below.
Step #1. The Linux Feature on Chromebook Must be Enabled and Updated
- On your Chromebook’s “Settings”, and then head to the left section where you shall see the “Linux Beta” tab. Others may see it under the “Advanced” menu.
- Move to the right pane to click the “Turn on” option. There would be prompts on the screen that must be followed to finally proceed with the setup.
- Once the setup is done, the “Linux Terminal” shall be shown. Alternatively, launching it from the “Applications” menu can also be done. This must be executed in the terminal - sudo apt-get update && sudo apt-get upgrade -y.
Step #2. Proceed to Install “Wine” and Make Sure That Support for 32-Bit Apps is Enabled
- To finally install “Wine”, this must be executed in the Linux Terminal - sudo apt-get install Wine.
- Just wait for a few minutes until the operation is completed. Once done, the following should then be executed one by one. This shall enable the support for 32-bit apps.
- sudo dpkg --add-architecture i386
- sudo apt update
- sudo apt-get install wine32copied to clipboard
Step #3. Start Downloading the iTunes App – 32-Bit Version
- On your Chromebook, go to a browser and then go to Apple’s website to head to the iTunes page.
- Tap the “Download” button. Once you have the file saved on your Chromebook, rename it – iTunes.exe (as an example).
- Head over to the “Linux Files”.
Step #4. Get Wine in 32-Bit Version
- On the Linux Terminal, execute this – WINEARCH=win32 WINEPREFIX=/home/username/.wine32/ wine iTunesSetup.exe.
- The iTunes installation window shall show up. You have to click the “Next” button and then choose “Install” afterward.
- Just continue to follow all the prompts that will be displayed on the screen.
- Finally, head to “Applications” on your Chromebook, and then from there, open “iTunes” to finally be able to use it.
And that’s how you can get iTunes on Chromebooks via the use of “Wine”! As promised, we’ve got more methods to share here so just stay tuned and keep on reading.
Method #2. Use the iTunes Website
We know that from reading the guide that was presented for the 1st method, most people would surely feel it’s complicated to do. Thus, we have here another option for how you can get iTunes on Chromebooks. That is, through the iTunes website.
![]()
Step #1. Open Google Chrome and go to the “Music page” on the official website of Apple.
Step #2. Press the “three-dot” icon that’s at the top section of the screen. From the options shown, tap the “More Tools” menu.
Step #3. From the sub-menu, tap the “Create Shortcut” option. You must enter “iTunes” as the shortcut name.
Step #4. There would then be a shortcut that would be created on your Chromebook’s desktop. You may now start listening to iTunes music.
Method #3. Importing iTunes Music to YouTube Music Instead
There is a much easier way that you can get iTunes on Chromebooks. You can also try this third method – importing iTunes music to YouTube music. Below is the procedure that must be performed.
Step #1. On your preferred web browser, go to YouTube Music’s website.
Step #2. You just have to drag and drop the iTunes music files that you have onto the YouTube music website.
Step #3. If asked, the “YouTube TOS” must be accepted. You just have to wait until the process is completed.
Step #4. Once the above is finished, the iTunes music files will then be available on YouTube Music. Since YouTube music is supported on most devices, it would be a lot easier to access the songs.
Method #4. Using a Virtual Machine Application
The last method of how you can get iTunes on Chromebooks that we are to share in this section is the use of a virtual machine application.
There are lots of applications that can be used and VirtualBox is one of them. Before you head into the steps to perform, make sure that you have downloaded as Windows ISO and that your Chromebook has enough storage space.
Step #1. Open a browser on your Chromebook. Go to the “Linux downloads” page from the VirtualBox site.
Step #2. Tap “Debian 10” and have it saved.
Step #3. Upon downloading, go to the file and double-tap it.
Step #4. Choose the “Install with Linux” button and then follow all the prompts that will be displayed on your screen.
Step #5. Upon installing, from the Linux Apps Folder, launch it. From the VirtualBox view, tap “New”.
Step #6. Follow the onscreen instructions to install a guest OS on VirtualBox.
Step #7. Upon doing the 6th step, open the virtual machine and then have iTunes installed on the guest OS.
Step #8. Once the above is done, open iTunes! This should be fully accessible on Chromebook.
Other Notes
- If you feel it is too much of a hassle to have iTunes on your Chromebook, you may also resort to trying other platforms that are supported by Chromebook itself. YouTube, Gaana, and Spotify are some good examples.
- Remember that you can only install the 32-bit version of iTunes on your Chromebook. The 64-bit version would obviously, not work.
Part 2: The Best Way to Get iTunes and Apple Music Songs on Chromebook
Upon sharing 4 workarounds of how you can get iTunes on Chromebooks in the first part, we will be giving you the best way that you can also try. Please take note that there are iTunes music files that are protected with DRM.
This goes the same with Apple Music songs. Thus, if you are planning to access these protected files on your Chromebook, there could possibly be an issue given that DRM-protected files aren’t accessible on unauthorized devices.
What is good is that there are great, trusted, and professional software apps that can help with the DRM removal process of iTunes.
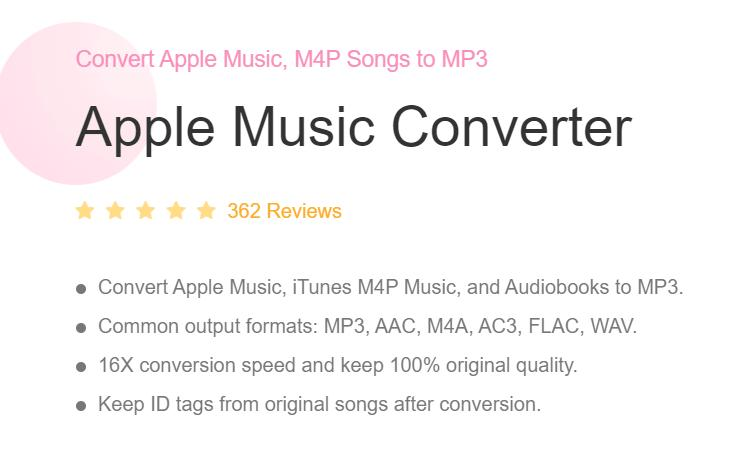
In fact, in this section, we will be highlighting how amazing the TunesFun Apple Music Converter is. Aside from being good at removing iTunes and Apple Music songs’ protection, there are plenty of other things it can do. Those are actually listed below.
- The TunesFun Apple Music Converter is powerful enough to get your tracks converted to common formats like MP3, FLAC, AC3, WAV, M4A, and more.
- It can even help you process audiobook conversion! If you are also fond of listening to audiobooks (apart from music), then it is good to consider using this tool as well.
- It has a notable fast speed that makes the whole process efficient for the users. You can definitely save time by using it. It even supports processing songs in batches! If you are looking at converting several songs in one go, this tool can surely help.
- The TunesFun Apple Music Converter can also ensure that the 100% original quality of the songs alongside their ID tags and metadata information will be kept.
- You can install this on your Windows and Mac computers.
- It has a proven easy interface that makes it too simple to navigate through each function. Even beginners would find it too worthwhile to use.
Presenting what the TunesFun Apple Music Converter can do isn’t enough. Of course, a tutorial on how it can be used to convert the protected iTunes and Apple Music songs shall also be presented here. If you’d like to give TunesFun Apple Music Converter a shot, then here are the steps that you must accomplish.
Step #1. There are a few things needed prior to the installation of the TunesFun Apple Music Converter on your PC. Complete all those to proceed.
Once the app has been installed, launch it. Start by previewing and choosing the tracks that you’d like to process. Again, since converting in batches is allowed, if you are looking to select lots of tracks, that should not be a problem.

Step #2. From the list of the available output formats, select the one you desire to use. Also, you’ll notice the output parameter options at the bottom of the screen. Modify any option that you’d like to change. Don’t forget to also set the output folder location to use.

Step #3. The TunesFun Apple Music Converter shall begin converting the selected tracks once the “Convert” menu (that is at the bottom of the page) has been tapped. While this is ongoing, the removal of the songs’ protection shall also happen at the same time.

Once you have the converted and DRM-free iTunes and Apple Music songs, it is time you move them to an external drive such as a USB drive. Once saved, you can then access them on other devices that you own such as your Chromebook!
Indeed, this is a much simpler method of how you can get iTunes on Chromebooks! Plus, you have also found out that moving Apple Music songs can be done as well!
Part 3: Summary
Though at first, we have learned that the answer to this “Can you get iTunes on Chromebooks?” is negative as the app is not natively supported by Chromebooks, it is still relieving to find out that there are numerous workarounds that we can apply in order to enjoy iTunes on Chromebooks.
We can always try using any of the four options that were presented in the first part. But still, the best method would be what was highlighted in the second part – downloading the songs via a tool like the TunesFun Apple Music Converter. In this way, you can even keep the tracks forever accessible even on other devices that you own!
 Home
Home
Leave a comment