Can You Restore Music From iCloud? [Updated Guide]
Perhaps, you also found it weird or strange when suddenly, your music files, specifically Apple Music, have gone missing. Thus, making you ask the same question above – “can you restore music from iCloud?”
Streaming via Apple Music as your platform is totally enjoyable and advantageous. In fact, once you get one of its paid plans, you will be entitled to enjoy its amazing perks which include the ability to download and stream Apple Music songs in offline mode. However, when you suddenly saw that all those downloaded tracks you have were gone the moment you are in the mood to listen to them, it would surely annoy you! In case this happened, you will definitely be curious about the answer to this query.
If you are currently facing this dilemma and haven’t found the answers you need yet, don’t worry. We’ll get everything you need discussed here.
Article Content Part 1. Are your Music Files in iCloud All Gone?Part 2. The Process of Restoring Music from the CloudPart 3. Avoid Losing your Music Library and Keep Them ForeverPart 4. Summary
Part 1. Are your Music Files in iCloud All Gone?
As mentioned, right away, we will be answering this “can you restore music from iCloud?” question here. Actually, yes, there is definitely a way for you to restore music from your iCloud. However, before trying to do it, it is best to check some tips and see if the tracks will come back even after doing the restoring process. We have three tips to share here.
Check or Verify your Apple Music Subscription
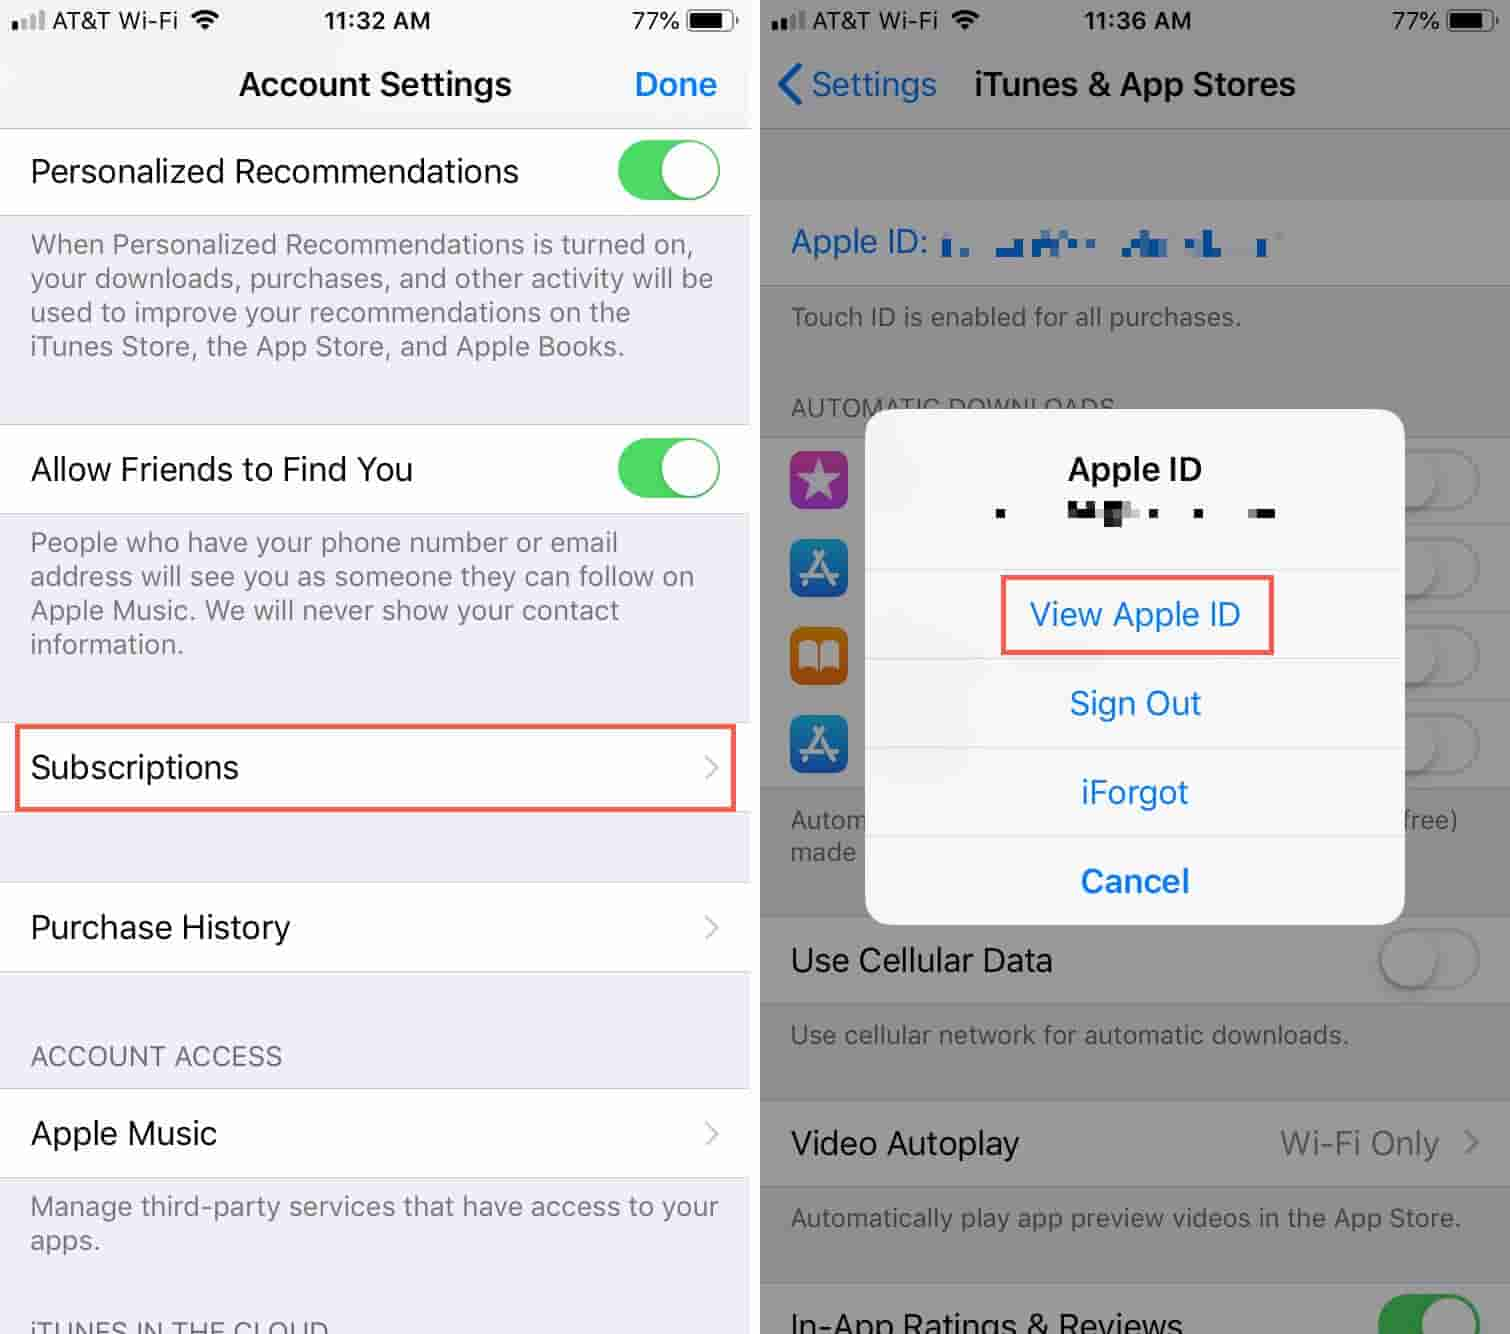
You must take note that once your Apple Music subscription has been canceled and was not renewed within 30 days from the date of cancelation, all the songs you downloaded using your account will vanish. Now, for you to double check your current subscription plan, on your iPhone, tap “Settings”, your profile, and then look for “Subscriptions”. Here, you will see if your plan is already expired. Alternatively, you can also head to “iTunes & Apple Store”, tap your Apple ID, click “View”, provide your login details, and then just scroll down until you see “Subscriptions”.
Check Your Sync Settings
The Sync Library settings must also be ensured as enabled to avoid issues when accessing Apple Music and tracks downloaded on your device. To double-check if this has been turned on, head to “Settings”, tap “Music”, look for “Sync Library” and make sure its slider has been toggled to “on”.

Check the Available iOS Update
It is also vital that you check if your iPhone has been updated to the latest iOS version. Also, you must ensure that your iTunes app has been updated as well.
Now, if upon checking the above three items and you are still facing the same issue – music files being gone and can be found nowhere in the Cloud, then that is the time you shall look into the process of restoring them. It is great to know that you can restore music from the Cloud. The only challenge would be how it can be done. Don’t worry, the process is totally easy to do. The details will be presented in the second part.
Part 2. The Process of Restoring Music from the Cloud
Since you already know that the answer to this “can you restore music from iCloud?” is a “yes”, it is now the right time you learn the full details of the process. We will be sharing how you can do it via your handy devices (iPhone or iPad) or via your Windows or Mac PCs.
Restoring Apple Music Library Using iPhone or iPad
Here is how you can restore music from the Cloud in case you are an iPhone or iPad user.
Step #1. On your iPhone or iPad, head to “Settings”. Scroll down until you see “Music”.
Step #2. Tap the “iCloud Music Library” option. Toggle its slider to “on”.

By doing the above, you shall be able to restore your music files. Please wait for some time until your music library re-appears in your “Music” app.
Restoring Apple Music Using Your Mac and Windows PC
If you are a Mac user, here is the guide you have to follow.
Step #1. On your Mac/Windows, launch the iTunes app.
Step #2. Tap the “iTunes” button that is at the upper left area of the screen. (For Windows, hit the “Edit” button) Choose “Preferences” from the list displayed.
Step #3. Hit the “General” tab next. You shall see the “iCloud Music Library” option. Ensure that the checkbox next to it will be marked. This will make the option turned as “enabled”.

The same as previously mentioned, it will take some time for your music files to appear in your iTunes library again.
Now, is it enough for you to just know the answer to this “can you restore music from iCloud?” question? Or, are you also thinking of looking for a method to avoid such instances of music library disappearance and finally have your music files saved on your devices forever? Well then, the next part will be beneficial to you.
Part 3. Avoid Losing your Music Library and Keep Them Forever
Now you have learned the way how can you restore music from iCloud, you should know that there is an easy way for you to keep your Apple Music favorites forever on any device that you like. It might surprise you especially if you are well aware that the downloading and offline streaming features are only exclusive to subscribers.
Though it is a given fact that Apple Music tracks are protected under Apple’s FairPlay Protection Program, you should be informed that they can still be saved through the help of amazing tools and apps like the TunesFun Apple Music Converter as this can aid in the removal of the protection mentioned.
In addition to having the Apple Music or iTunes DRM removal ability, it can also help you with file conversion. It actually supports formats like MP3, FLAC, AAC, M4A, AC3, and WAV. With its conversion rate of 16x, you can save time while making sure that no data will be lost and that the quality of the files won’t be at risk. So you can set high-quality Apple Music songs as ringtones for free without any limit.
This app works well with both Windows and Mac computers so compatibility isn’t something to worry about. This professional converter is a trusted tool that can surely be used by beginners and professionals as its interface is simple and easy to navigate or handle. For everyone’s reference, doing the conversion procedure via this app is easy especially if a guide is being used.
Step #1. Once the app has been installed on your computer, launch it and start by previewing or selecting the Apple Music songs to be converted and processed. Choosing several songs to be processed is possible since batch conversion is supported by the app.

Step #2. Select an output format to utilize. Modify the remaining output parameter settings (which can be seen at the bottom of the page) as well if you’d like to.

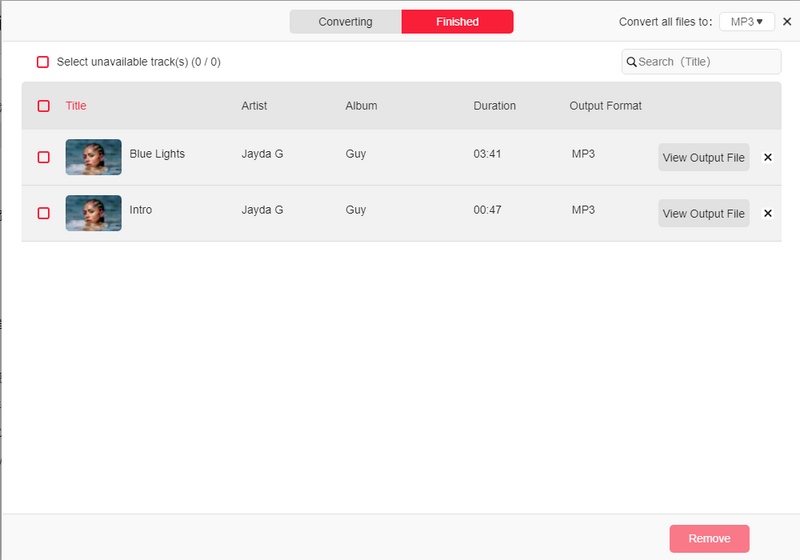
Step #3. Tapping the “Convert” button that is at the bottom-right corner of the screen will trigger the app to start converting the chosen tracks. The DRM removal process shall also be done at the same time.

Step #4. Within just a few minutes, the output files will be readily available. All these should be free from protection and can be accessed on any device or media player of your choice! Now, you can have them saved as long as you want to without worrying if they’ll disappear!
Part 4. Summary
Hopefully, this “can you restore music from iCloud?” is no longer a query to you now as we have answered this already in this post. Sharing with you how the process of restoring can be done also made us glad! You can follow the procedures we presented here. In addition, in case you are looking at saving your Apple Music favorites forever on any gadget you own, don’t forget to consider the use of the TunesFun Apple Music Converter!
 Home
Home
Leave a comment