

How To Copy iTunes Library To External Drive [Backup Guide]
Are you worried about all the music files that are stored on your computer? They are taking up too much space on your computer, but you are not ready to let them go. So, you look for ways how to copy iTunes library to external drive to solve the dilemma. There are many points that can be solved when you learn the proper methods on how to backup iTunes library to external drive, from being able to free the disk space on your personal computers to keep a backup of your music files.
In this article, we are going to discuss some of the workable solutions that people can do which can help create a backup of their music files and copy them to an external drive. And if we are going to think about it, one of the best things about using an external drive to store your music files is you are able to use it and turn it into a server that holds all the music files that you love. You can also use it to access your music files using all the devices that you have, depending on how frequently you want as well.
Article Content Part 1. How to Back Up iTunes Music to the External Hard Drive?Part 2. Bonus: The Best Method to Back Up iTunes Music LibraryPart 3. To Summarize It All
Part 1. How to Back Up iTunes Music to the External Hard Drive?
One of the things that you have to be aware of are those points that you needed to prepare prior to following the steps on how to copy iTunes library to external drive. Also, it is better that you have an idea about your iTunes library. It is a database prepared wherein there are different types of media stored on it such as movies, media files, TV shows, and music tracks. The said library is observed to be sorted into two parts namely iTunes Library files and iTunes Media folder. So, let us move to the things that you have to prepare before copying the iTunes library to an external drive.
Step 1. Consolidate Your iTunes library
In order to consolidate your library, here are the steps that you have to follow.
- On your computer, open the iTunes app.
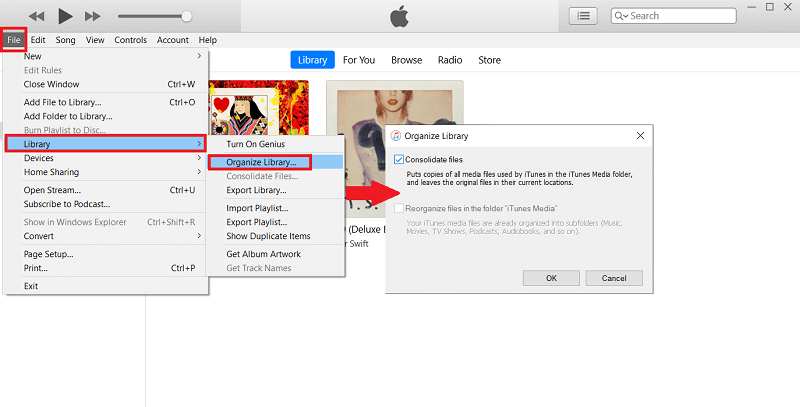
- Go to the top part of the window of the iTunes interface, and then choose “File”, then go and tap “Library”, and then tap the “Organize Library” option.
- You have to mark a check on the “Consolidate Files” option.
- Then do not forget to click “Ok”.
You have to know that all the files that are not included in the iTunes Media folder will be added, and must be consolidated as well. Before deleting all the files from your computer, you have to ensure that the said files are added.
Step 2. Copy iTunes Library to External Drive
If you have an organized iTunes library file, it is a given that the process on how to copy iTunes library to external drive will be easy. In case you are aware of how messy your iTunes Library is, you have to prepare all the points that we have discussed in the previous part of the article. Otherwise, here are the steps that you have to do:
Step 1. You have to close your iTunes app.
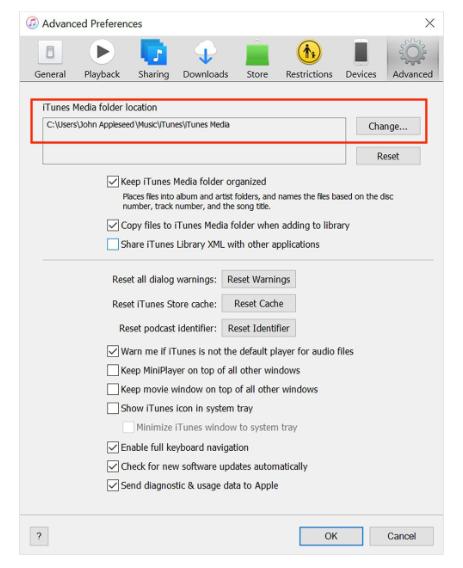
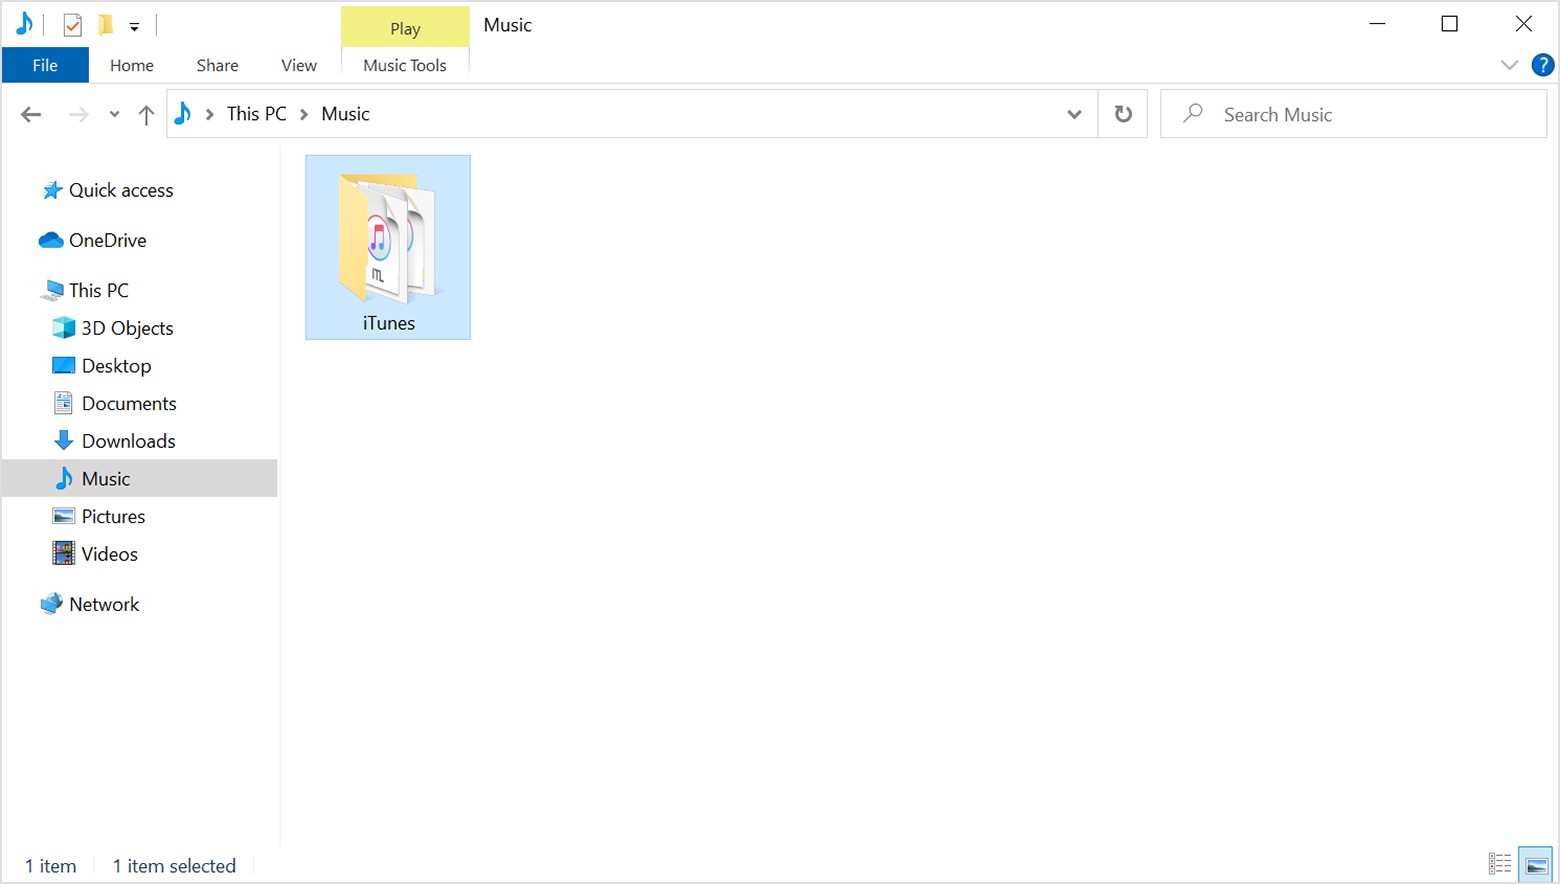
Step 2. You have to locate your iTunes folder which is based on the location that is given or stated in your iTunes.
Step 3. In order to copy the iTunes library to the external hard drive, you have to drag your iTunes folder to the icon of your hard drive.
Step 4. The time that it will take to copy your iTunes library to the external hard drive will depend on how large your library is.
If you really treasure your music library, it will be better to always create a copy of these music files. In case you add files weekly or monthly, then the frequency of how you back up your library should depend on it.
Part 2. Bonus: The Best Method to Back Up iTunes Music Library
Anywhere we go and whatever we feel, we long for music. It is a wise way to detox from stress and be over the things that can be out of control. As much as we thought that music is easy to access and listen to, there can be situations in which they aren’t, as well. This is also why music lovers wanted to have an idea of how to copy iTunes library to external drive. In this way, they can be assured that all their loved music files will be kept or stored.
As we have discussed in the previous parts we saw how promising Apple Music can be, although there can be some difficulties along the way. As we know, songs from Apple Music are protected by DRM encryption, thus making access to songs difficult and inconvenient. Because of DRM, listeners can't listen to songs they need or want quickly, it would not be easy to copy their music files into an external drive, as well.
There are conditions that must be met, it must be ensured that you are using an authorized device by the Apple Company and that you are paying for the Apple monthly music plan. This way you can listen to songs while you are offline or having trouble with the internet connection, and copy or transfer music files on an external drive if you want to.
If you are not subscribed, all the music tracks that you have downloaded will be gone for good, what a sad note it is. But, we have something great to share with you! It is possible to conveniently listen to all your wanted songs with the help of a professional converter! The said situation can be solved through the help of the TunesFun Apple Music Converter.
This tool is one of the most efficient professional converters in the market today. TunesFun Apple Music Converter can do a lot for any listeners who would like to use it as a partner in achieving trouble-free listening wherever a person may be. Meaning to say, you will have permanent rights on managing the files, wherein you can choose to transfer an iTunes playlist to another computer or burn CDs from iTunes in order to play them via CD players. Here is a list of some of the good features of this converter.
- Get rid of the DRM encryption. So you can freely access all your most loved songs using any type of device you have even if you did not subscribe to the paid version of the platform.
- Save money. You can listen to any song that you wanted even when you are offline.
- Convert your tracks to flexible formats like MP3, MP4, FLAC, and WAV.
- The conversion rate of using this professional converter is faster compared to basic ones in the market.
This tool is also easy to use and here are the steps on how to use the TunesFun Apple Music Converter as your partner in how to copy iTunes library to external drive or others.
Step 1. It is a must to download the TunesFun Apple Music Converter and install it on your computer. Once you are sure that the tool is downloaded and installed on your computer, you have to start adding all the songs that you wanted to convert.

Step 2. You have to create a folder that will be the home of all the music tracks after the process or conversion.

Step 3. Hit the Convert button, finally! You can see the status of the conversion process at the main interface of the tool's platform.

After a few minutes, you are able to convert all the files that you have selected, and now you can copy your iTunes library to an external drive anytime you want!
Part 3. To Summarize It All
All the best methods and things that you have to prepare on how to copy iTunes library to external drive are well shared and discussed above. When it comes to listening to songs offline, it is a must to always look for the best options that would make the listening experience worth the while.
On the other hand, it is a great thing that we have professional converters like TunesFun Apple Music Converter that would be of the best convenience to any user that would like to enjoy all the songs without encountering any trouble or hassle along the way. After all, these days music has been one of the basic commodities and shouldn't be difficult to access anytime.
 Home
Home
Leave a comment