Detailed Guide: How To Delete Songs On iTunes On iPad?
Life without music is definitely boring. Every day, when traveling to school, to the office, or anywhere, or even when doing stuff at home, lots of people would definitely love hearing their favorite tunes. If you have been a fan of using the iTunes app and you like streaming your library via your iPad, you’ll probably be curious about what this post is about to share.
Though we’ve got bunches of songs that we love to listen to, there are still cases when we’d want to remove some of them. Thus, making us curious about how to delete songs on iTunes on iPad. Users do have different reasons why they’d like to remove songs from their devices. Some could be because they wanted rooms for new songs, some would just want to trim down the number of songs that they have in their library as there could be a lot already, or maybe, some users just got tired of streaming the same songs again and again.
Whatever reason you have in mind, you will definitely learn the information you wish to know when it comes to the process of how to remove songs by reading each section of this article.
Article Content Part 1. How to Remove Music from an iPadPart 2. Deleting Tracks from Your iTunes LibraryPart 3. Learn How to Keep Apple Music or iTunes Songs ForeverPart 4. Summary
Part 1. How to Remove Music from an iPad
As previously mentioned, this section of this post will be showing you detailed guides on how to delete songs on iTunes on iPads. Though well received in its early years, iTunes received increasing criticism for a bloated user experience. Beginning with Macs running macOS Catalina, iTunes was replaced by separate apps, namely Music, Podcasts, and TV, with Finder and Apple Devices taking over the device management capabilities. Accordingly, your iTunes library as you knew it, with all your purchased music, should be available inside the Music app. You can do the deletion of iTunes songs via your iPad by accomplishing either of the two methods that we are to present here.
Method #1. Deleting Songs Directly Through the Music App
If you have certain songs in mind that you would like to delete to free up your music library, you can do that by using the Music app. If you’d like to try this method, you can just simply follow the below steps.
Step #1. On your iPad, launch the Music app.
Step #2. Look for the specific iTunes song that you wish to delete.
Step #3. Once you found the songs, touch and hold the item, then tap Remove.
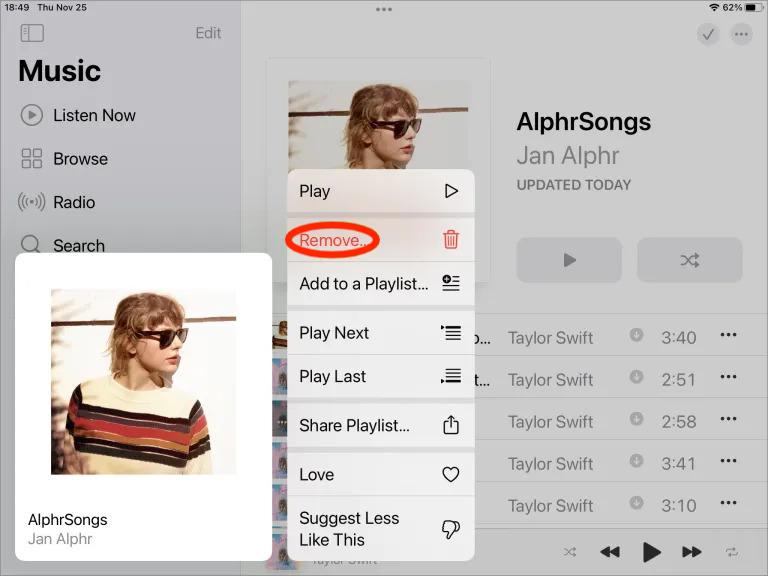
Step #4. Several options will be shown after tapping the drop-down menu. From those seen options, make sure to choose “Delete from Library”. You must confirm that you’ll proceed by clicking the “Delete Song” button next.
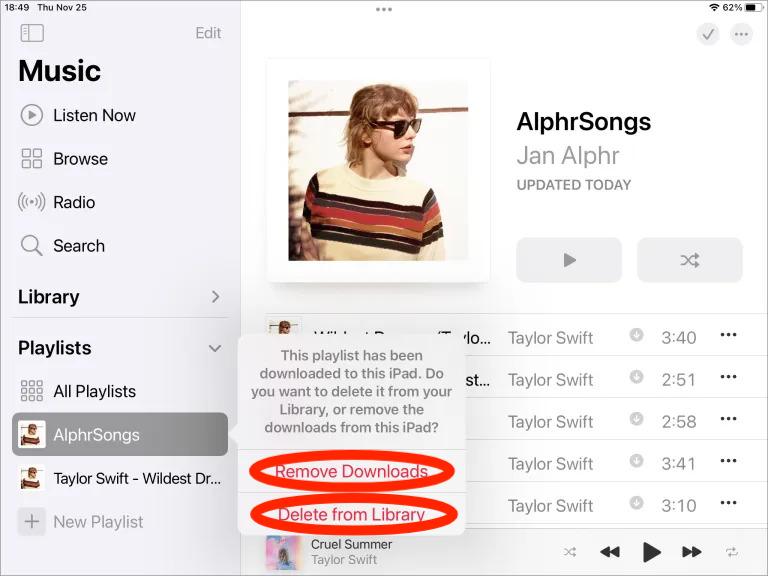
Once you have completed the above, then the selected songs for deletion shall now be removed from your iTunes music library! You can just repeat the same process of how to delete songs on iTunes on iPads if that was mentioned if you intend to delete bunches of tracks.
Method #2. Deleting Songs via the iPad’s Settings Menu
As previously stated, we are to highlight here two methods of how to remove songs on iPads. Since we are already done discussing the first one, we are now down to the next. If you are not comfortable using the first method, you can always resort to trying this second one.
Here are the steps that you must follow in case you’d like to try this method instead.
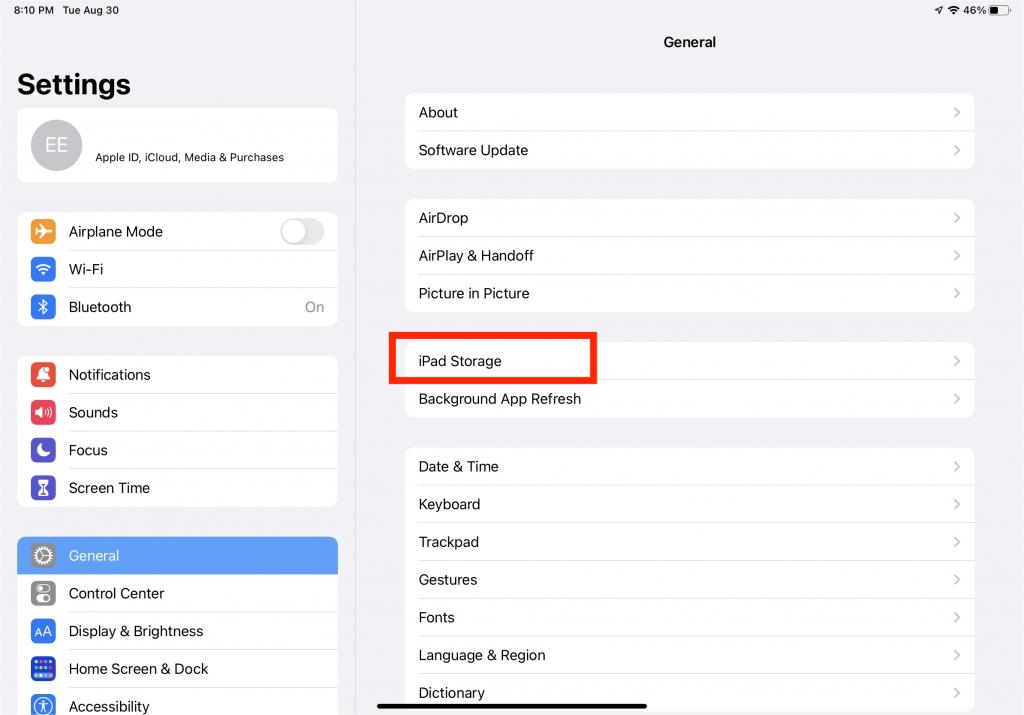
Step #1. On your iPad, head over to the “Settings” menu.
Step #2. From the options, tap the “General” button.
Step #3. You have to click “iPad Storage” next.
Step #4. Scroll down until you see “Music”.
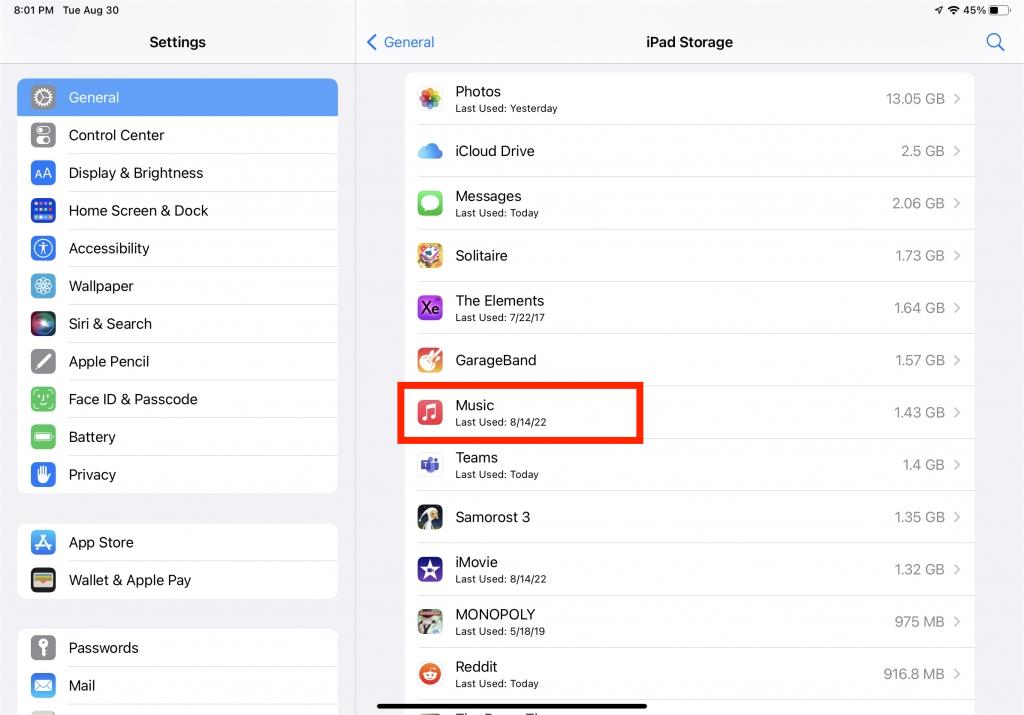
Step #5. You shall see the “Edit” button at the top. Just tap on it.
Step #6. Next to “All Songs”, you shall see a red icon. You just have to press this.
Step #7. Click the “Delete” button next to get all the songs deleted or removed from your iPad or library.
This is a better option to do if you are aiming to delete all the iTunes songs that you have. You can also do individual deletion of songs via this method if you wish to. You just have to look for the specific song to delete.
As simple as doing the above process of how to delete music on iPads, you’ll be able to remove all the iTunes songs that you no longer would want to keep!
Part 2. Deleting Tracks from Your iTunes Library
Apart from sharing with you how to delete songs on iTunes on iPads, we would also want to share a detailed guide of how you can delete everything that’s in your iTunes music library. If you want to remove everything that you have in your new library and start afresh, then you must take note of the below procedure that must be accomplished.
Step #1. You must have your iTunes app closed or turned off.
Step #2. On your Mac, launch “Finder”.
Step #3. Hit the “Go” option.
Step #4. Tap the “Home” option next.
Step #5. On your Mac, just browse for the “Music” folder.
Step #6. From the available options, you must choose “iTunes”.
Step #7. Look for these files - "iTunes Library.itl" and "iTunes Music Library.xml".
Step #8. Once you have found where the abovementioned files are, you just have to delete them.
Once you have accomplished the above, you shall notice that your iTunes music library has now been cleared or emptied!
Remember that when you perform the process of how to remove songs, the songs that you deleted will be gone from your iPad or if you do the deletion process directly on iTunes, those will be gone forever.
Part 3. Learn How to Keep Apple Music or iTunes Songs Forever
Though it is indeed helpful to learn how to delete songs on iTunes on iPads as well as through iTunes, there are still instances when you feel like you wanted to listen to the songs you just deleted. Thus, making you repeat the process of downloading them for offline listening.
In this case, to lessen the burden on your side, rather than clearing your iTunes music library, why don’t you just learn how to download and keep the iTunes and Apple Music songs that you have on other gadgets or external storage devices? You are probably wondering how this can be possible given that iTunes-purchased songs and Apple Music tracks are protected by DRM. Well, this isn’t something you should be worrying about.
When it comes to downloading and removing the protection of Apple Music and iTunes songs, there are bunches of great apps that can help you out. In fact, we recommend using one of the best, the TunesFun Apple Music Converter. With the aid of this professional tool, you can easily do the DRM removal process and even the conversion of the songs to formats like MP3, WAV, or FLAC. You don't worry about that you can play music even if Apple Music is not working because you have these converted music files, you can save them on the media player. By having standard music formats, you’ll be able to play iTunes songs on your Xbox One too!
When it comes to TunesFun Apple Music Converter’s conversion speed, you also don’t have to think a lot. It works fast enough allowing you to save time. It can even process lots of songs. All the songs’ important details and original quality will be preserved as this app does lossless conversion.
TunesFun Apple Music Converter is also supported by both Windows and Mac OS so installing it won’t be a dilemma. The team also makes sure that the app is updated consistently. Thus, you can be assured that you are getting the best out of the app!
With TunesFun Apple Music Converter’s easy interface, you can navigate the keys and functions even if it’s your first time using the app. Let’s do a quick run-through of the steps that you have to do to convert and download Apple Music and iTunes songs through TunesFun Apple Music Converter.
Step #1. Once you have the TunesFun Apple Music Converter installed on your PC, open it and start choosing the tracks to be converted and downloaded.

Step #2. Select your desired output format and alter the output parameter options that you’d like to change.

Step #3. Hitting the “Convert” button at the bottom of the page shall trigger the app to start transforming the songs. The removal of the songs’ protection will also happen at the same time.

Once you have the non-DRM and converted tracks, you can just keep them on any storage devices that you own so that when you feel like you are into streaming them, you can just easily search them up and listen to them!
Part 4. Summary
The process of how to delete songs on iTunes on iPads is totally easy. If you feel like your collection is now boring to listen to, you can just get rid of them through simple clicks. Doing so via iTunes can also be done. However, when you suddenly would want to listen to them again, you need to re-download them to proceed. If you don’t want to experience such hassles, then just download the songs through the TunesFun Apple Music Converter and keep them on any device that you have!
 Home
Home
Leave a comment