How to Make Apple Music Profile Private in 2025
If you’re an avid Apple Music fan, you’ll know that the company has been investing a lot of money in social media. They’ve publicly created your Apple Music profile for you to share on platforms like Facebook, Instagram, or Twitter. Because of this, understanding how to make Apple Music profile private is becoming valuable information.
The way to advertise products and services has changed since the last time you saw TV commercials. With the advent of Facebook, Twitter, and Instagram, everything has changed from knowing the latest trends, to find out new stories about your high school buddies. Apple knows all of this and now they’re using you, their customer, to advertise for them.
Because of this, it’s not unusual that you to want to know how to make Apple Music profile private. You do want some privacy of some sort and not let anybody know your music preferences.
Article Content Part 1. How to Make Apple Music Profile Private? Part 2. Bonus: How to Download Apple Music for Offline Listening? Part 3. Summary
Part 1. How to Make Apple Music Profile Private?
Your Apple Music preferences and profile are not private by default. People you’re not close to may see your music preference. The Apple ecosystem has created a social media platform in itself but you’ll find this extends to other platforms like Facebook, Twitter, Instagram, or just about anywhere else.
The advent of the Share button is the one to blame. So now you’ll learn how to make Apple Music profile private. It’s not very hard to do as long as you follow the steps.
On the Apple Music app on your Phone:
- Open the Apple Music app.
- Go to the Listen Now section below.
- You’ll find your profile icon on the upper-left side. Tap on it.
- Press edit.
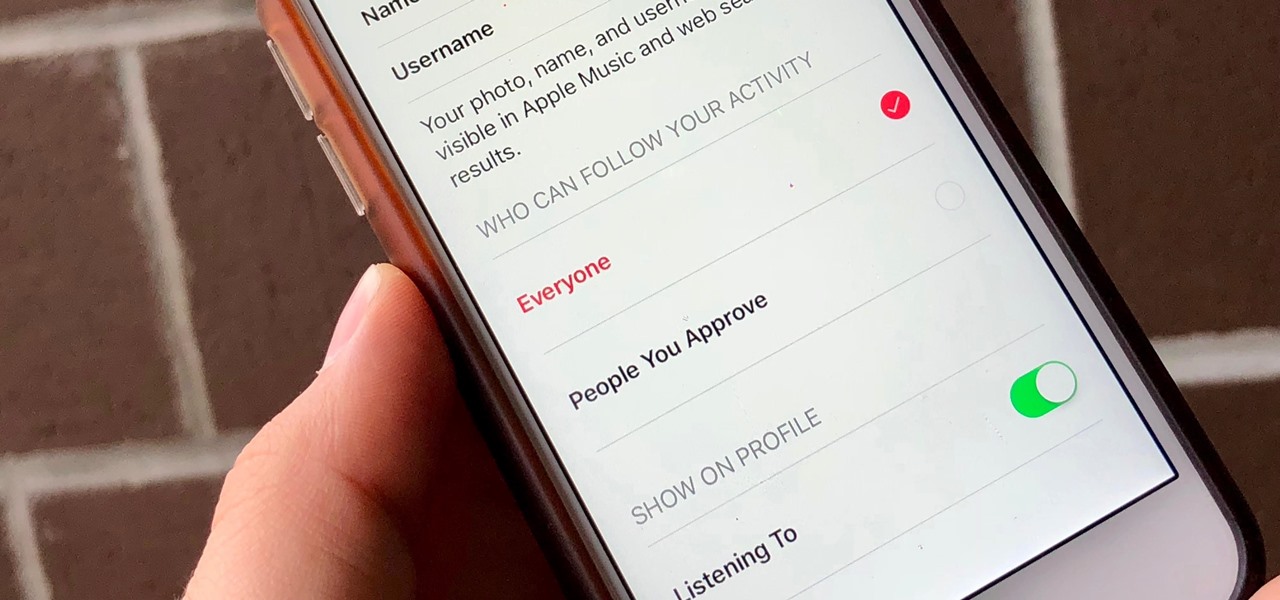
- On the section Who Can Follow You un-check Everyone and check People You Approve.
- Scroll down below to the end. You should see Additional Privacy Settings. Tap on this.
- To make your profile and listening experience private turn the switch off for Listening To.
On iTunes or Apple Music:
- Open iTunes on your PC or Apple Music on your Mac.
- Go to the For You tab. You should see your profile icon on the right side. Click it.
- You’ll be shown your profile and library details. Click EDIT.
- On the Choose Who Can Follow Your Activity, choose People you approve.
- Click the Additional Privacy Settings option.
- On Privacy Settings, Show on Profile un-check Listening To. This will prevent the albums and playlists that you listen to from becoming public.
That’s it! You’ve just learned how to make Apple Music profile private. It’s a simple feat that anyone can make. Additionally, we suggest removing any adware or malware software on your PC or phone. These things wreak havoc and compromise your privacy and security. We do not know what things it has been sharing or stealing from you. It may even be still your Apple Music preference and playlists! Whatever it is, regularly scan your PC or Mac with reliable antivirus software.
We also suggest downloading commercial software rather than free ones. It’s better for the software seller to be committed to his products or service. Those free online tools and software may contain adware or malware that can wreak havoc on your privacy in the long run. If you truly want an offline experience with your Apple Music, we’ll suggest a versatile tool in the next section.
Part 2. Bonus: How to Download Apple Music for Offline Listening?
If you want to know how to make Apple Music profile private almost indefinitely, we’ll suggest a third-party tool for this. This tool is the TunesFun Apple Music Converter. TunesFun Apple Music Converter will make your Apple Music profile private by making your Apple Music library playable offline. This means you’ll be able to play them too with any hardware or media player software. An Apple Music ID will not be required for you to play your downloaded music. This means your Apple Music profile need not be exposed every time you play your songs.
This may give some people peace of mind, especially those sensitive to prying friends or acquaintances that are curious about your music preferences. Download and install the trial version of TunesFun Apple Music Converter. If you find it useful, purchase a time-limited or perpetual license key. This will remove the 3-minute song cap on your conversions.
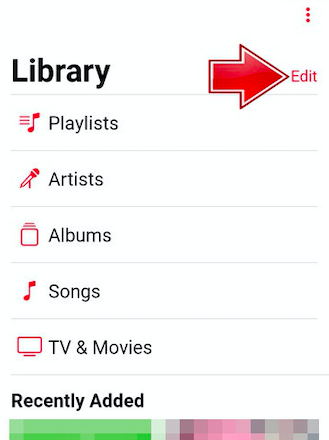
To operate Tunesfun, open the app then go to Library. Choose the songs you want to be converted to. You may be surprised that it’s already synced with your Apple Music library. This has been thought out carefully by TunesFun.

You can optionally change the settings below. Change output formats, directories, or metadata. This converter can output different music formats such as MP3, AAC, M4A, AC3, FLAC, and WAV. Once you’re happy, click Convert to start converting. When finished go to the Finished tab. This will contain all your converted songs. Click View Output File to go to the output directory. That’s it! You’ve converted your Apple Music songs for offline listening permanently!

No more worries about your Apple Music preferences being displayed publicly. You even can play these songs even without an Apple Music subscription. You can now make backup copies of your Apple Music songs and even edit them without the restrictions of DRM. It’s all being handled by TunesFun Apple Music Converter.

Part 3. Summary
In summary, we’ve just taught you how to make Apple Music profile private. This is an important thing especially if you’re quite sensitive to the information you’re sharing on the net. Your music preference should only be allowed to be made public with your permission. We’ve also taught you another way to make your Apple Music profile private indefinitely using a third-party tool.
This tool is the TunesFun Apple Music Converter. This can convert all your downloaded Apple Music songs and play them offline anytime, anywhere even without an internet connection. By removing DRM, your Apple Music songs are now free. You can also be assured that your Apple Music profile will not be displaying your played songs.
 Home
Home
Leave a comment