How To Make Your Own Alarm Sound: Easy And Simple
Two of the hardest things to do every morning are definitely to wake up and get out of your bed. With your sleepy head, you’ll surely feel annoyed every time your alarm clock wakes you up. But the case would surely be different if you’ll get to hear an audio that’s loved by your ears. We bet you’ll agree to this. Perhaps, you are also interested in finding out how to make your own alarm sound that’s why you’re here and reading this post.
Once you woke up upon hearing your favorite tunes, it will surely reduce your grogginess and will somehow boost your mood and energy to start the day right. Indeed, learning how to create your own alarm sound is vital, especially for those who are not “morning” people. Fortunately, there are various ways to make a custom alarm sound. We will be dealing with each one by one as we move into each part of this article. Let’s begin!
Article Content Part 1. How to Create Your Own Alarm Sound?Part 2. How to Set Apple Music Songs as Alarm?Part 3. Summary
Part 1. How to Create Your Own Alarm Sound?
Here, some ways to customize the alarm sound shall be explained in detail. If you are too excited to find out more information about this post’s topic, then start reading what we have here.
Create Your Own Alarm Sound on iPhone via Your Voice Recordings
Do you have some voice recordings on your iPhone that you would wish to be set as your alarm sound? Well then, you will learn how to make your own alarm sound using that in this section.
Step #1. Export the Voice Recordings to your PC
- On your iPhone, launch the “Voice Memos” app.
- If you don’t have a recording yet, you can record one by tapping the “Record” button. To finish it, just click the “Stop” menu. Remember that the length should only be within 30 seconds.
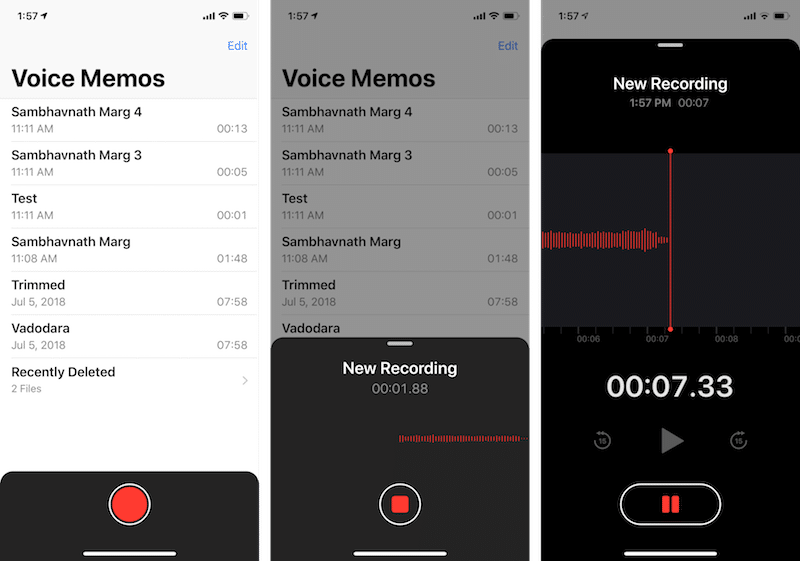
- You have the option to trim the recording created. To do so, just click the “Trim Memo” option. Using the slider, you shall be able to choose where to start and stop the audio file.
- Choose “Share” next, then “Email” to get to send the voice recording created.
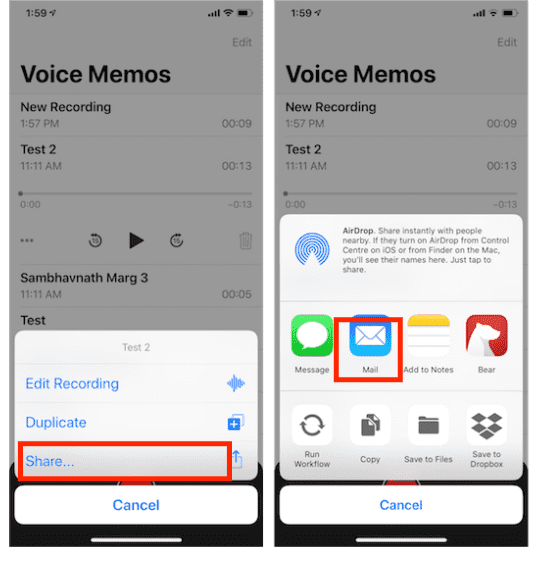
Step #2. The Extension Needs to be Changed to “M4R”
- On your PC, open your e-mail account.
- Look for the attachment sent, right-click on it, and choose “Save As” to be able to save it to your PC.
- On your PC’s folder, right-click the downloaded file. From the options displayed, choose “Rename”. The extension needs to be changed to “.m4r”. After doing so, just tap the “Save” button.
In case you can’t see the extension, just right-click the file, select “Open file location”, then “View”, and then put a check on the “File name extension” option.
Step #3. Get the M4R Files Synced into your iPhone
- Your PC must have the latest version of the iTunes app. Launch it.
- Have your iPhone connected to your PC via a USB cable.
- Tap your device’s icon on iTunes.
- Hover over the extended section and from there, select “Tones”.
- You may now start to drag and drop the M4R file that you have to this mentioned location.
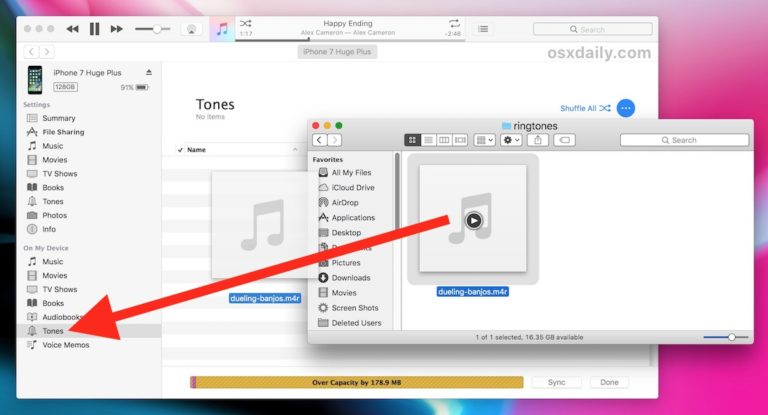
- Now, choose the “Sync” option.
Step #4. Time to Set the Custom Ringtone as your iPhone’s Alarm
- On your iPhone, open the “Clock” app.
- At the bottom of the screen, you shall see the “Alarm” option. Tap this.
- Choose the “Edit” button next.
- Select an alarm wherein you would like the new sound to be used.
- Now, select “Sound”. From the list, look for the custom ringtone created.
Create Your Own Alarm Sound Using a Third-Party Application
Another method of how to make your own alarm sound is via the use of a third-party application. Actually, there are bunches on the web but you can check out the EaseUS Ringtone Editor that’s known as a popular ringtone maker. Using this, you have the option to upload an MP3 file or download a sound directly through the built-in audio downloader that it has. Here’s a quick guide in case you are interested in this way of customizing the alarm sound.
Step #1. Once you have the EaseUS Ringtone Editor on your PC, launch it. Importing the audio file to use is easy as you can just drop the file onto the main screen. Alternatively, browsing through your folders will work as well.
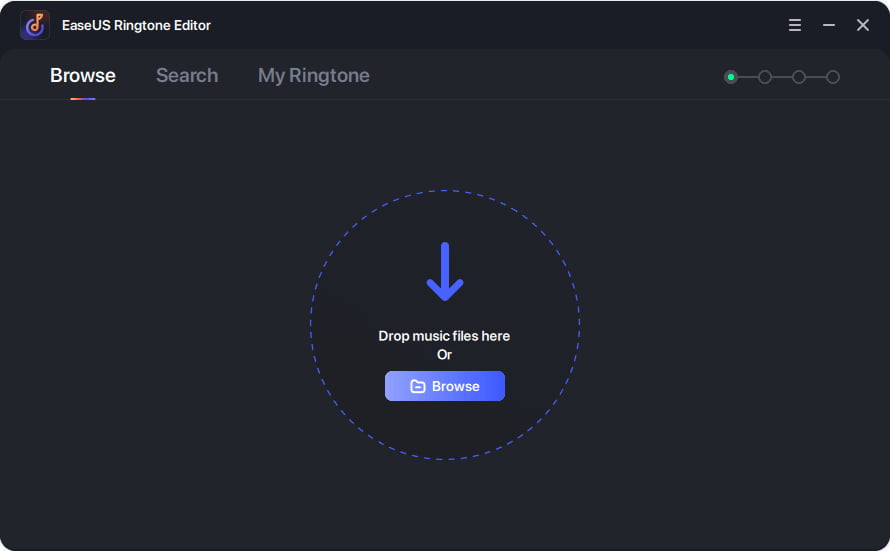
Step #2. An interface showing the uploaded audio file shall be shown. Dragging the slider will let you choose the part of the file that you wish to keep. Once you have this set, tap the “Clip” button. If you don’t want to perform this, you have the option to select “Skip without Clip”.
Step #3. It is now time to edit the audio file. You can get the sound fade in or out, adjust the volume, and do more. Once you’re done, just click the “Export” button.
Step #4. During the exporting of files, you will see options available. There are two – “Push to iPhone” or “Save to Disk”.
As simple as that, you can get your customized audio files used as your iPhone’s alarm sound.
Now, what if you are looking at using certain Apple Music songs as your device’s alarm sound? How will you be able to do that? What is then the process of how to make your own alarm sound using your Apple Music favorites? The next part has all the information you need! Let’s move on.
Part 2. How to Set Apple Music Songs as Alarm?
It is surely exciting to find out how to create your own alarm sound. But it would be more thrilling to know how you can have your Apple Music favorites set as your device’s alarm sound! We know you’ll totally agree with this! Doing this is possible with or without an Apple Music subscription. If you wish to find out more details about this, then keep on reading.
Set Apple Music Songs as your iPhone’s Alarm Sound (with Apple Music Subscription)
Fortunately, the app itself, the Apple Music app, was already improved allowing the setup of Apple Music tracks as alarm sounds directly possible. We’ve got the detailed steps that you must follow to eventually do this.
Step #1. On your iPhone, launch the “Music” app. Ensure that you have signed in using your account credentials.
Step #2. Look for the Apple Music track that you’d like to use as your alarm sound.
Step #3. Make sure to add the selected track to your library. If you haven’t done it yet, just choose the “+Add” button.
Step #4. Before you set it up as your alarm, ensure that the song has been downloaded as well. Downloading songs is a perk that Apple Music subscribers can enjoy.
Step #5. After downloading, open the “Clock” app on your iPhone and then head to the “Alarm” menu.
Step #6. Choose the alarm you wish the sound to be changed. Tap the “Edit” button.
Step #7. Under the alarm editing view, head to “Sound”, then select “Pick a song”, and “Songs”. Here is where you can choose the downloaded Apple Music song.
Step #8. Once everything has been done, you just need to click the “Save” button to get all the changes saved on your device.
Again, in using this method, you have to make sure that you are currently subscribed to one of Apple Music’s premium plans. Else, accessing and downloading Apple Music tracks won’t work.
Set Apple Music Songs as your Device’s Alarm Sound (without an Apple Music Subscription)
How to make your own alarm sound without Apple Music's subscription? As mentioned, it is also possible for you to set your favorite Apple Music song as your alarm sound even without an active subscription to Apple Music. We would need to get rid of the songs’ protection first and convert their formats to MP3. Let’s further dig into this.
Convert and Download Apple Music Songs
When converting Apple Music songs, you must be using professional apps such as the TunesFun Apple Music Converter. It is indeed a very capable tool that lets you remove the DRM protection contained by Apple Music songs and get them transformed into formats like MP3.
The TunesFun Apple Music Converter is great enough as it works pretty fast (at a speed of 16x) and supports bunches of common formats like MP3, FLAC, M4A, AAC, and AC3. How to keep songs from Apple Music and your own music forever? You can save these converted songs somewhere safe. You don’t have to worry about losing your songs when you unsubscribe from Apple Music.
When using this, you also don’t need to worry about losing the good quality of the files as that will be maintained including the songs’ ID tags and metadata information. Installing this on your computer should not be an issue as well as this is perfectly compatible with both Windows and Mac OS.
In fact, if you are also an audiobook lover, you can utilize this to get your audiobook files transformed. It has an interface that’s easy making it simple to navigate. Here’s a quick overview of how you can use the TunesFun Apple Music Converter to convert and eventually download your Apple Music favorites so you can use them as your alarm sounds.
Step #1. Once downloaded, launch the TunesFun Apple Music Converter. On the homepage, you shall see the option to preview and choose which Apple Music songs to process. Batch conversion is supported so selecting bunches for one-time processing is definitely allowed!

Step #2. Choose the output format you prefer by selecting from the drop-down menu next to the “Output Format” option. Modify those remaining output parameter settings as you wish.

Step #3. Click the “Convert” button at the bottom area of the page to get the process started. While the transformation of the files is ongoing, the DRM removal process shall also be done at the same time.

Within a short span of time, the transformed and DRM-free Apple Music songs should be readily available. You now need to learn how to set them up as your device’s alarm sounds.
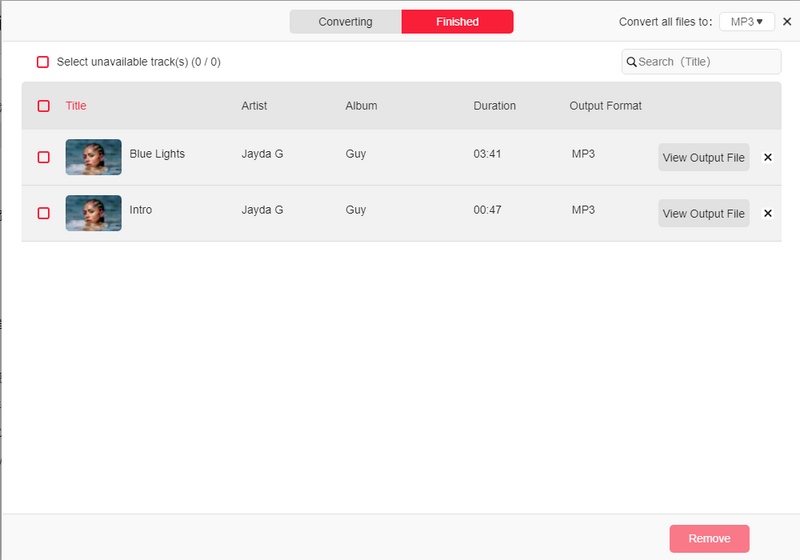
Set the Converted Apple Music Songs as Alarm Sounds
How to make your own alarm sound using these converted songs? Whether you are using an iPhone or an Android device, you can get these converted Apple Music songs saved as your alarm sounds. You just have to follow the below guides.
On your iPhone
Step #1. Using your iPhone, head to the “Clock” app. Tap the “Alarm” menu at the bottom.
Step #2. Choose the alarm you wish to alter. Tap the “Edit” button next.
Step #3. Tap the “Sound” menu that you’ll see. You now have to scroll until you found the imported and transformed Apple Music song.
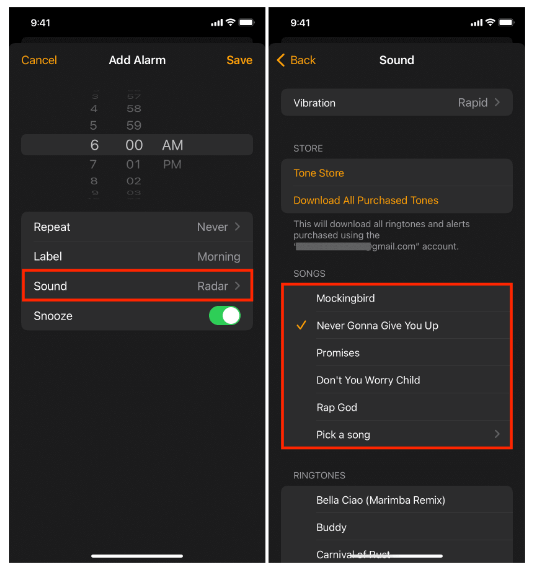
Step #4. To confirm the changes made, ensure to tap the “Save” option.
Upon completion, you should be able to listen to the set Apple Music song every time this alarm of yours rings!
On your Android
Step #1. Using your Android device, head to “Settings”. Choose the alarm that you wish to modify.
Step #2. Move to the “Sound & vibration” menu, then choose the “Add Alarm” button next.
Step #3. Scroll down to look for the uploaded Apple Music song to make it the alarm sound.
Now, you don’t have to worry that much if you are so in love with an Apple Music song and you wish to use it as the tune to wake you up every morning! You just have to follow what we shared in this post!
Part 3. Summary
It is indeed relieving to find out that there are various methods of how to make your own alarm sound. More so, if you have been into Apple Music streaming, it is definitely a great thing to find out that you can even use your favorites as your device’s alarm sounds! Thankfully, amazing apps like the TunesFun Apple Music Converter that can help with Apple Music conversion and downloading are always available to use!

Leave a comment