Let’s Get To Learn Ways Of How To Move iTunes Library!
iTunes is definitely considered one of Apple’s trademarks. Being a media player and a file organizer, there is no doubt why millions have this software application installed on their computers. More so, it has been flexible as it is supported not only by Mac OS but also by Windows PCs. With the use of the iTunes app, you can keep track of all those favorites of yours – movies, music, TV shows, and more. Apart from being available on computers, iTunes can also be used on portable devices such as iPads and iPhones.
If you are wondering how to move iTunes library or transfer all your current collections in case you change the device you are currently using, you don’t actually have to think that much. There are several ways you can actually get your library moved.
We will be sharing with you some of the many ways of how to move your iTunes library in this post. If you are interested in learning all of them, then stay tuned and read all this post’s sections.
Article Content Part 1. Move Your iTunes Library via an External DrivePart 2. Move Your iTunes Library via .XML FilePart 3. Move Your iTunes Library via Home SharingPart 4. Move Your iTunes Library via iTunes MatchPart 5. Keep All Your iTunes and Apple Music Songs Forever on Any Device!Part 6. Summary
Part 1. Move Your iTunes Library via an External Drive
The first method of how to move iTunes library that we’ll present is the use of an external drive. By simply copying and pasting the tracks on your iTunes library to your external drive, you’ll be able to transfer them to another device such as another PC. This is the most recommended if you are trying to move files that aren’t protected or are not brought from the iTunes Store.
If you wish to try this way of moving iTunes library, you just need to use the below guide.
Step #1. Get your external drive plugged into your old PC and then just look for the folder containing the songs.
Note: If you can’t locate this folder, you can just hit the “File” button, choose “Library”, then “Consolidate Files”. By doing so, iTunes should copy the songs to a certain folder. Usually, you can find it at “C:\Users\YourUserName\Music\iTunes\iTunes Media”. To view the location of the iTunes media folder, just tap “Edit”, choose “Preference”, then “Advanced”.

Step #2. Quit iTunes. Find your iTunes folder. Right-click on your iTunes folder, then choose Copy. Go to your external hard drive, then right-click and choose Paste.
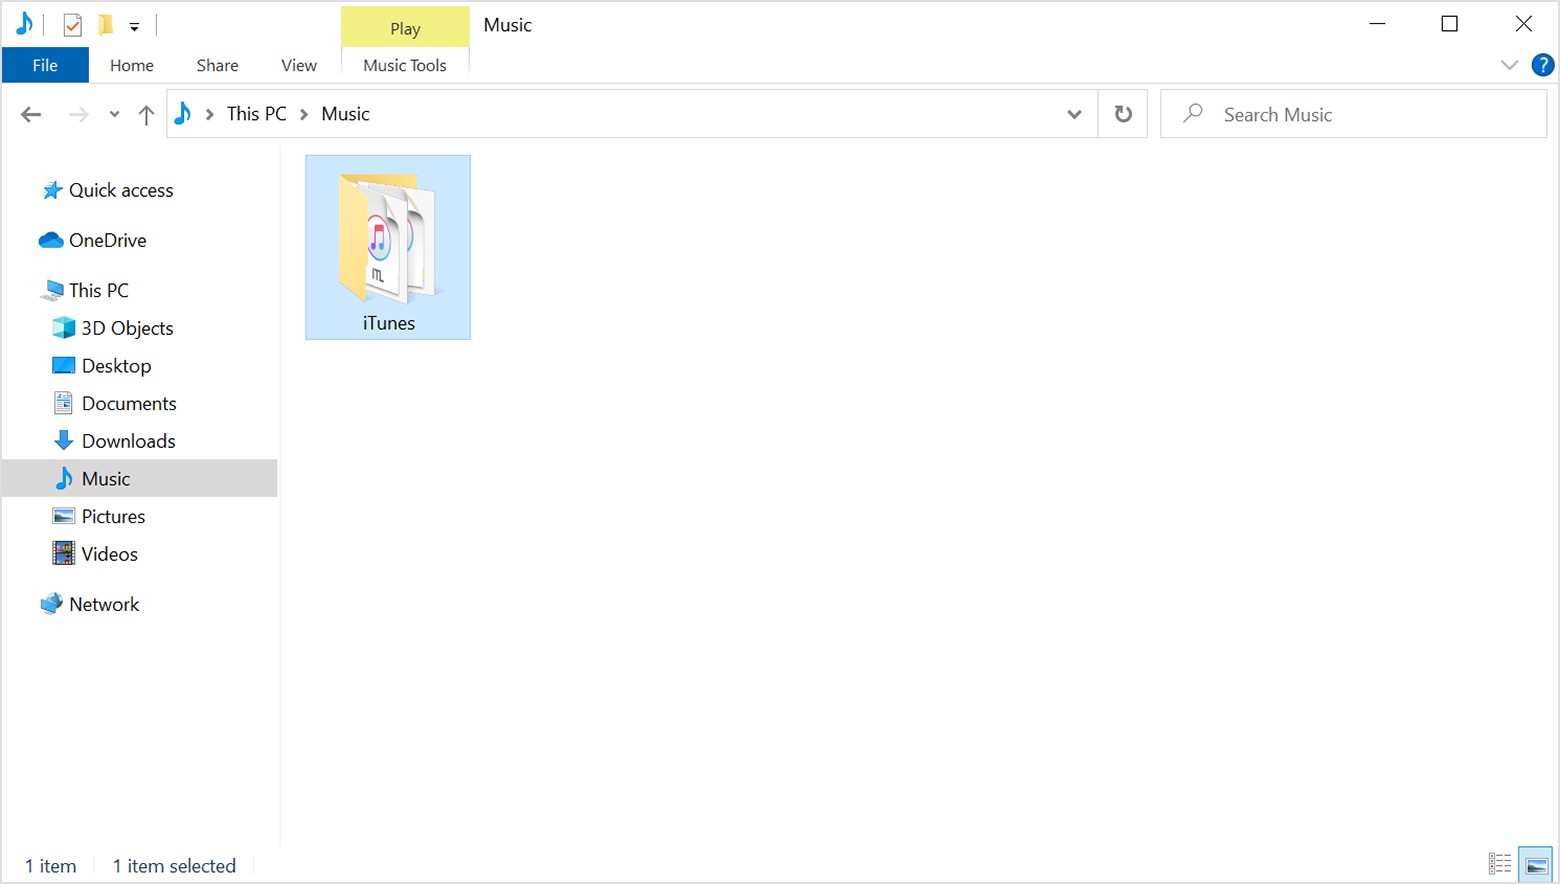
Step #3. On the new computer you have, just plug the external drive. Once this is recognized by your new PC, get the folder and paste it to the new PC’s local drive.
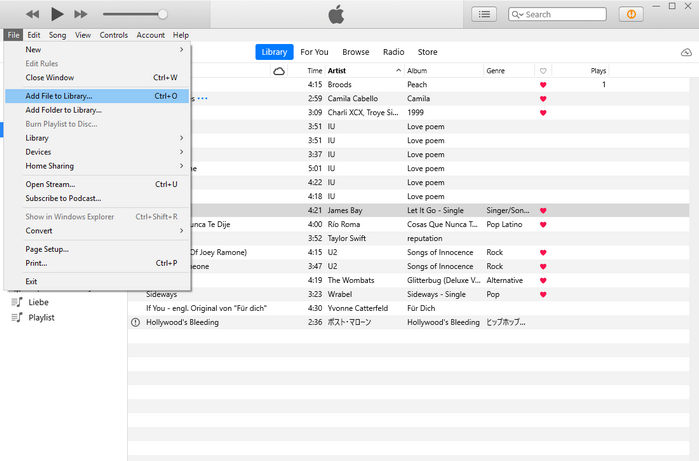
Step #4. Launch the iTunes app on new PC. Tap the “File” button, then the “Add File to Library” menu. Search where the media folder is and start importing all music to your iTunes library.
This is perhaps the simplest process of how to transfer iTunes library to a new location. Let us move into the next part to learn another method.
Part 2. Move Your iTunes Library via .XML File
Though the first way of how to move iTunes library that was highlighted in the first part was often regarded by many as the simplest, some say using an .XML file is the fastest. To find out if this is true, you can also try the procedure we have in this part.
In this method, you have to generate an .XML file and copy it. Remember that this is recommended only if you have all songs purchased from iTunes. Else, the app won’t be able to play them.
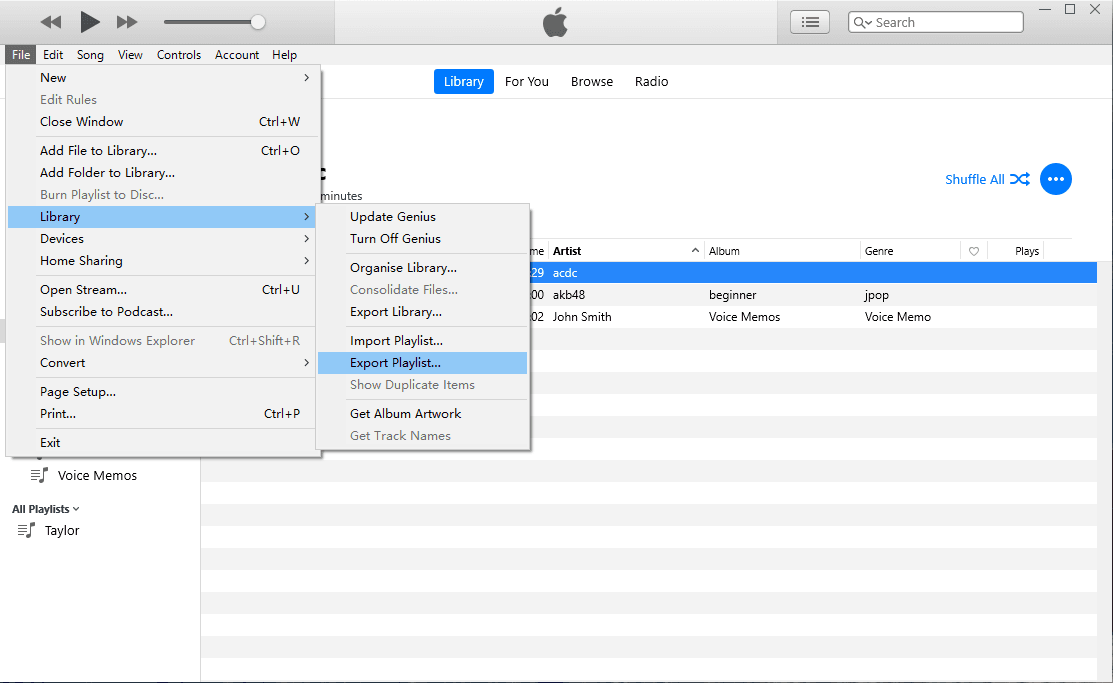
Step #1. Launch the iTunes app on your old PC. Simply tap the “File” button, then choose “Library”, and finally, tap the “Export Library” menu.
Step #2. Once you have generated the .XML file, copy it and save it to your external drive. Once connected to your new PC, paste it.
Step #3. Launch the iTunes app on your new computer. Simply tap “File”, then “Library”, and choose “Import Playlist”. By then, you just need to open the .XML file.
Voila! That’s it. That’s another way of how to transfer the iTunes library. In case you’ll no longer use your old PC, make sure that you deauthorize it after performing any method of how to move your iTunes library that you would want to use.
Let us see another technique of how to transfer the iTunes library to a new location in the next part in case you are in for more!
Part 3. Move Your iTunes Library via Home Sharing
If in case you are wondering if you can use home sharing to transfer your files from your current iTunes library, you are right, that’s possible! Apple Home Sharing is a neat way to make music, movies, and other media available on other devices on a user's home network without a subscription. Since the Home Sharing feature is integrated into macOS and iTunes, setting up a server isn't nearly as hard as it might sound. And, that is what we are about the explain in this part. All you need is just to follow the below procedure.
Step #1. It is a must that you check that both devices you are to use have the latest version of the iTunes app. Both should be connected to the same Wi-Fi network. You can check the version of iTunes you are using on Mac by tapping “iTunes” and then choosing “About iTunes” next. When an update is available on the Store, you just have to download it and install it.
Step #2. It is also needed that you organize your iTunes library first. To do this, tap “iTunes”, then click “Preferences” from the options displayed. From the dialog box that would appear, the “Keep iTunes media file organized” menu must be checked as well as the “Copy files to iTunes Media folder when adding to library” option. This is in case you are using a Mac.

For Windows users, once the iTunes app is launched, tap the “Edit” button, then select “Preferences”. Ensure that all files are organized before tapping the “OK” button.
Step #3. Once you are done with the previous step, it is now time that you get the “Home Sharing” menu turned on (on the old PC). You should be able to see this option on the left side of the screen.
Step #4. From the dialog box that would be shown on the screen, you would have to input your Apple ID and the password you are using. If you don’t have one yet, creating should be simple so do it. Afterward, tap the “Home share” button.
Step #5. On the new PC, under “Store”, you have to tap the “Authorize This Computer” option. A new dialog box shall pop up wherein the same Apple ID and password (entered on the old PC) must be inputted. After doing so, tap the “Authorize” menu.
Step #6. The “Home Sharing” option must also be enabled on the new PC. As you move to the left side of the screen, you should be able to view those on your old PC as you head under the “Shared” icon.
Step #7. Just choose those that you want to move or transfer. Since we are aiming at learning the methods of how to move iTunes library, you can choose those from your iTunes library. Tap the “Edit” button then choose “Copy”. Once this is done, you will now be free to drag the chosen items to your new PC. However, manually copying could result in duplicated files. Thus, many are recommending to just select all the items. Doing this is simple. You just have to press the “Edit” button again, then choose “Select All” this time before you click the “Import” button.
Remember that copying or moving could take some time depending on how huge the files are.
Part 4. Move Your iTunes Library via iTunes Match
Fortunately, Apple has come up with the idea of easily migrating tracks from one device to another. This is through iTunes Match. Unfortunately, this only works for music files. At the moment, moving videos, applications, or other data won’t work. In addition to this, an active iTunes Match subscription is needed. If you don’t have an idea, this costs 24.99 USD annually.
In case you wish to try this method of how to move iTunes songs, you may refer to the below guide.
Step #1. On your old PC, launch the iTunes app, then head to “Store”, and choose “iTunes Match” to see your account’s current status. If you don’t have a subscription yet, you can just easily buy from this page.
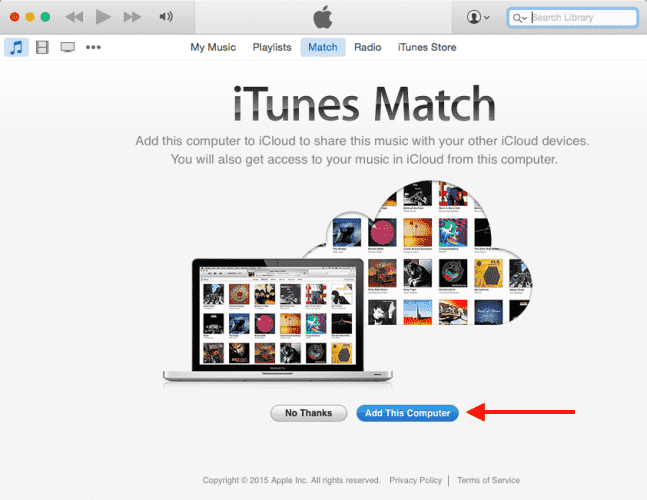
Step #2. On the new PC where you would want the iTunes songs to be moved, open the “iTunes” app and then move to “Store” again, then to “iTunes Match”. Tap the “Add This Computer” menu and sign in to your Apple ID account as this is needed when linking to iTunes Match.
Step #3. iTunes will then be syncing the library to your Apple account. Wait until this is over. iTunes will notify you once the process has been done.
As simple as doing the above, you will be able to finally move those iTunes songs that you have in your library from your old PC to your new one. Keep in mind that iTunes Match is only available in iTunes 10.5.2 or higher for Mac or Windows and Apple's Music app on the iPhone, iPad, Mac, or Apple TV. The service is unavailable on Android.
These are only four of the possible many other ways of how to move your iTunes library. These are, of course, recommended and definitely are proven to work effectively.
As you move into the next part, you will be exposed to a method that will help you keep all your iTunes music favorites with you forever! If you are interested, then keep on reading!
Part 5. Keep All Your iTunes and Apple Music Songs Forever on Any Device!
We have shared the way of how to move iTunes library. You can easily choose the solution you want to move your music library to a new location. But songs purchased from the iTunes Store and from Apple Music are protected files. Thus, they can’t be accessed outside the apps or on devices that are unauthorized. Keeping them playable on any device that you own could be quite hard for you but we’ll definitely help you out.
In this case, you would be needing a powerful software application that can help you download any iTunes or Apple Music songs. The TunesFun Apple Music Converter is definitely a good recommendation.
The TunesFun Apple Music Converter is a trusted tool that helps one get rid of the DRM protection the iTunes and Apple Music songs contain. This means that once it is removed, you may now transfer and play the converted songs to any devices that you own. This professional app even helps in the conversion of files to common formats like MP3, FLAC, AAC, WAV, and more. These songs are also accessible any time for as long as you want, and can keep them forever without restrictions. You can also get free Apple Music songs.
This even works fast at a speed of 16x and ensures that all metadata information and ID tags are preserved as well as the songs’ original quality. You won’t need to worry about installing this because it works so fine with both Windows and Mac OS. And, it’s easy to handle. Let’s take a quick look at how easily the app can be managed.
Step #1. Once installed, open the TunesFun Apple Music Converter and start to preview and choose all those iTunes and Apple Music songs to process.

Step #2. Select an output format to use from the supported ones. At the bottom of the page, the output parameter settings displayed can also be modified as preferred.

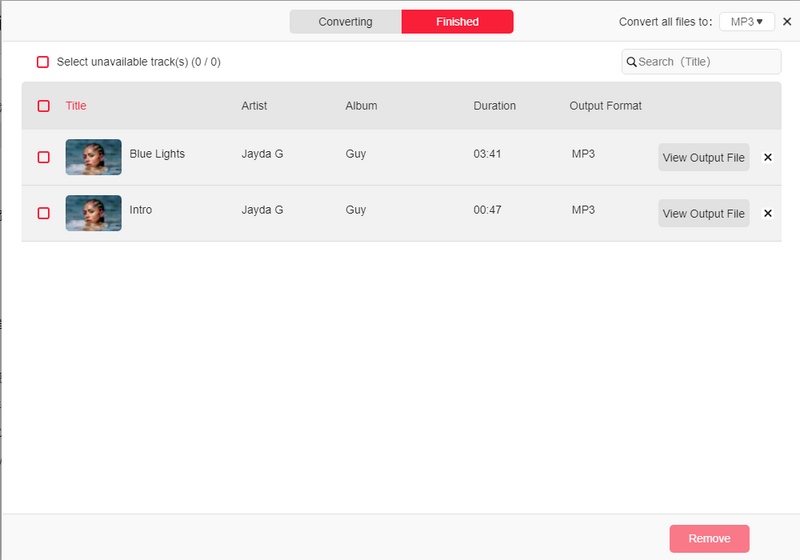
Step #3. Simply tap the “Convert” button at the bottom of the screen to get the conversion and DRM removal processes started.

Step #4. You should be getting the transformed and DRM-free songs within just a span of minutes. Those can be saved on and device you own without worrying if they’ll play as they are now free from protection and are in formats accessible on any device!
Part 6. Summary
We are fortunate as there are various methods of how to move iTunes library from your old computer to another device that you own. You can try those that we have shared in this post. Moreover, if you are looking to save or keep all your iTunes or Apple Music favorites forever, all you need is to get them downloaded via powerful apps such as the TunesFun Apple Music Converter.
 Home
Home
Leave a comment