Learn How to Play Music Through USB from your iPhone Here!
“I have been thinking of how I can play music through USB from iPhone. I would love to stream my favorites on other devices or speakers that I own but quite unsure how to accomplish the whole process. I hope somebody can help me out.”
Being a music enthusiast surely made a lot of people love storing bunches of songs on their devices such as on their mobile gadgets like iPhones. If you are one of those who have music files that you’d like to listen to on your PC, other media players, speakers, and more find out how to play music through USB from iPhone will definitely be beneficial. In fact, it’s easy to play music through USB from iPhone if you are only targeting DRM-free songs. However, if you are into protected songs such as those that you can stream via the Apple Music app, then that would be a different case.
In order to play music through USB from iPhone (for protected tracks), there would be a need for a professional software app that has the power to get rid of the protection of the songs. You will be finding out more details about this as you move to the first part. For the unprotected ones, of course, there are also options available that would be shared in this post. If you are now excited to learn how you can finally be able to play music through USB from iPhone, start off by reading what we have in the first part of this post.
Article Content Part 1. Download Apple Music Songs via the TunesFun Apple Music ConverterPart 2. Other Options to Save Music from iPhone to USB DrivePart 3. Summary
Part 1. Download Apple Music Songs via the TunesFun Apple Music Converter
If you are an Apple Music fanatic who loves streaming your favorites on your iPhone but suddenly would wish to learn about the procedure of how to play music through USB from iPhone, you will be learning all that you need by reading this section of the article.
Apple Music songs are known to be protected files that can’t be accessed on unauthorized devices or gadgets unless otherwise, the protection will be removed first. In the case of playing music through a USB from an iPhone (specifically, Apple Music tracks), one of the vital things that must be accomplished is the removal of the songs’ protection. The DRM protection contained by Apple Music tracks is hindering the access of the files on other gadgets as well as being able to have the songs saved on external drives such as USBs. In such cases, we would be needing the help of professional software tools such as the TunesFun Apple Music Converter.
The TunesFun Apple Music Converter is a powerful app that lets one get rid of the Apple Music songs’ protection within just a few clicks. In addition to this advantage, there are bunches of perks that can be enjoyed by using this app. These are listed below.
- The app can aid in the conversion of songs to common formats like MP3.
- The app supports several output formats including MP3, FLAC, AAC, WAV, AC3, and M4A.
- The app’s conversion speed is fast (at 16x conversion rate) promoting efficiency to users.
- The app’s navigation keys and functions are simple promoting convenience and ease of use.
- You can get the assurance that the tracks’ original quality and metadata information will be preserved even after processing them through the app.
- This app can be installed on both Windows and Mac OS. Thus, you won’t have any issues when it comes to installing the app.
- It supports batch conversion of songs.
- Updates are always being done on the app to improve the users’ experience.
In order to use the TunesFun Apple Music Converter well, we have also detailed here the steps that you must perform to finally be able to play music through USB from iPhone.
Step #1. Install the TunesFun Apple Music Converter on your PC and on the main screen, and start previewing and choosing the Apple Music songs that would be processed. Again, selecting bunches will work as batch conversion can be done by this app.

Step #2. Select an output format that you’d like to use. At the bottom of the page, there are output parameter settings that can be changed as preferred. Don’t forget to specify the output folder location to be utilized.

Step #3. Hit the “Convert” option once you are satisfied with the setup made. This will trigger the app to start transforming the selected Apple Music songs. At the same time, the DRM removal process shall also happen.

Once the whole process is completed, you may now start saving the songs to your USB drive and then listen to them on any device or speaker that you own. Errors or issues won’t be encountered anymore!
Part 2. Other Options to Save Music from iPhone to USB Drive
If you are looking at saving protected files such as Apple Music songs from your iPhone to your USB drive, then the right and best thing to do is to use tools such as the TunesFun Apple Music Converter that was explained in the first part. However, if you got unprotected music files, you may also check out some other options of how to play music through USB from iPhone. We will also be explaining some of them in this section of the article. If you are interested to learn more about them, then just keep on reading.
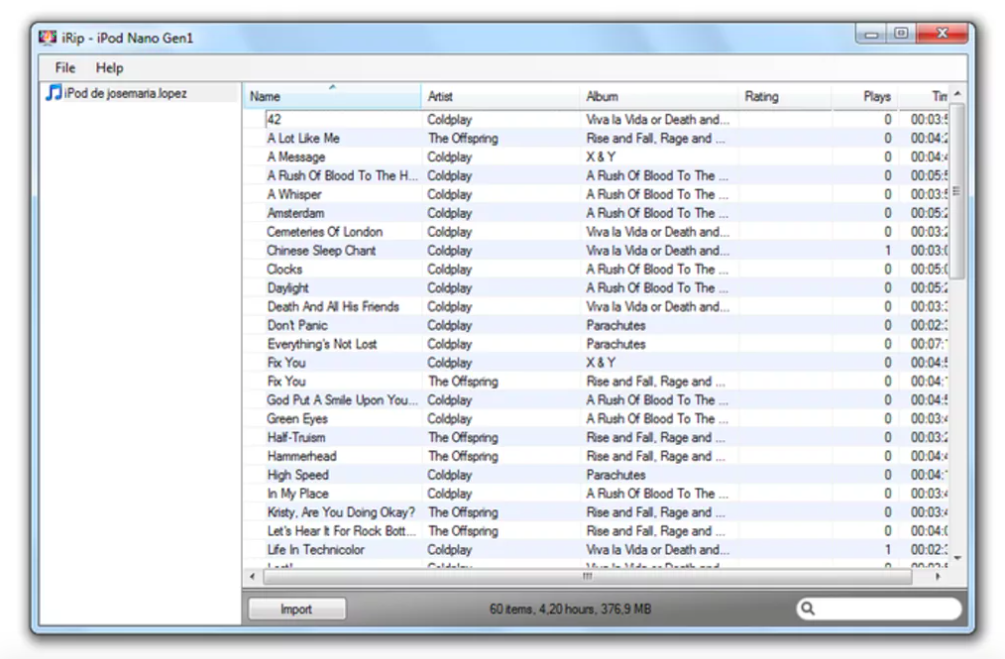
Way #1. iRip
One of the many possible software apps that you can use to play music through USB from iPhone is iRip. Actually, apart from helping you move music files, it can also be used to move other media content such as videos, podcasts, TV shows, and iBooks. If you would want to consider using iRip, you just have to follow the below-detailed guide.
Step #1. Before we start, the “iTunes auto-sync” option must be disabled first. If you aren’t sure on how to do it, you may refer to the below.
- Launch the latest version of the iTunes app on your PC.
- Tick off the “Edit” button.
- Choose “Preferences”, then “Devices”.
- Finally, select the “Prevent iPods, iPhones, and iPads from syncing automatically” option.
Step #2. You must have your iPhone and the USB drive to be used plugged into your computer’s port. Afterward, open the iRip app.
Step #3. Once you see the welcome screen of the app, hit the “Manual Import” option, then press the “Change Location” menu under the “Destination: iTunes” option.
Step #4. A new window shall open where you will be able to choose the songs you’d wish to save to your USB drive. Tap the “Music” option that is on the left side of the screen, highlight the tracks, and finally, hit the “Import” menu.
You’ll finally have the selected songs saved onto your USB drive!
Way #2. TuneJack
If you don’t feel like using iRip, then you might want to use TuneJack to play music through USB from your iPhone. This is an app for Windows users and thus helps with the transfer of tracks from your iPhone to your USB drive. In case you wish to try using TuneJack, you just have to follow the below guide.
Step #1. The iTunes’ auto-sync function must also be disabled first. You may refer to the same procedure that was highlighted under “iRip” to do this.
Step #2. The “Manually manage option” must be turned on next.
- Your iPhone must be connected to your computer. Launch the iTunes app afterward.
- Hit the “Device” button, and then tap “Summary”.
- You shall see the “Option” section on the screen, scroll down until you see the “Automatically sync when iPod or iPhone is connected”. The checkmark in this option must be removed. Now, make sure that the checkmark is present next to the “Manually manage music and videos” option.
- Save the changes made by tapping the “Apply” button.
Step #3. Start the transfer of songs from your iPhone to your USB drive. Once the TuneJack app has been launched, you’ll be asked to choose the target host drive. You have to move to your USB drive and select your desired folder. The transfer shall begin once the “Begin Copying Songs” menu has been tapped!
Part 3. Summary
It is definitely easy to play music through USB from iPhone! If you are looking at saving your favorite Apple Music songs to your USB drive, you would just need help from apps like the TunesFun Apple Music Converter! Other options or apps can also be used such as iRip or TuneJack if you have unprotected music files that you’d like to transfer.
 Home
Home
Leave a comment