Solved: How To Play Windows Media On Mac In 2025?
Being a Mac user is totally an advantage for many given that Mac computers are highly recognized as great devices to use. Several media content are now being shared in different formats that are known to be playable on various operating systems. However, you would somehow occasionally encounter files or items that you won’t be able to open. Surely, that would bring annoyance and frustration.
If you have been using a Mac computer, you are surely curious about how to play Windows Media on Mac. You might have experienced attempting to access WMA (Windows Media Audio) or WMV (Windows Media Video) using Mac’s pre-installed media player, QuickTime, or any other player that you have, but failed to do so. An error message was surely displayed on your screen!
You don’t have to be sad about the above situation right away. As mentioned, we have this article created to give you a guide on how to play Windows Media files on Mac as there are indeed solutions or workarounds that you can apply. Let us get into these methods of how to play Windows Media audio and video files on Mac now.
Article Content Part 1. Defining Windows Media Files’ FormatsPart 2. 2 Ways to Play Windows Media Files on MacPart 3. Convert the Windows Media Files Via an Online ToolPart 4. Extra Tip: Downloading Apple Music FilesPart 5. Summary
Part 1. Defining Windows Media Files’ Formats
Before we move into the ways of playing Windows Media on Mac, let us first look into Windows Media files’ formats. In case you have downloaded or received files in WMV or WMA format, you should know that those are Windows Media files. To give you an idea, the WMA format is being used to store only audio whereas WMV is being used to contain images and video sound.
The files encrypted in the abovementioned two file formats are totally playable on Windows machines. These files, by nature, aren’t accessible on Mac. If you decided to move from the Windows environment to Mac, and you have several Windows Media files, then migrating could be a real issue.
Fortunately, as previously stated in the introduction part, there are various ways of how to play Windows Media on Mac. We’ll get to meet all those as we head over to the next sections of this post.
Part 2. 2 Ways to Play Windows Media Files on Mac
Finally, in this part, you will be able to know two easy ways how to play Windows Media files on Mac. Let us now dig into these methods.
Method #1. Installing a Media Player (or a Third-Party App) for Mac
We will be sharing two third-party applications that you can install on your Mac to play Windows Media files in this section.
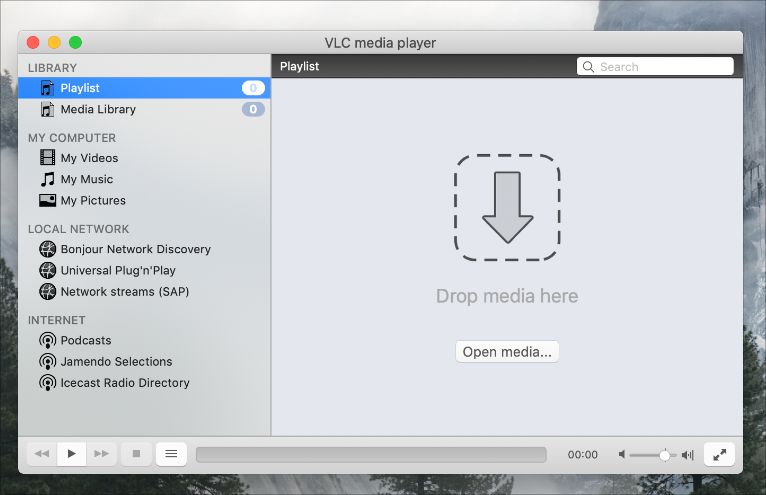
VLC Media Player
One of the most commonly known media players is the VLC Media player. We’re lucky that this can be installed not only on Windows computers but on Mac PCs as well. It is also free of use and is open-source software that has the ability to play WMV and WMA files. Apart from this, the VLC Media Player also has built-in video editing features that most people find attractive. To highlight how to play Windows Media on Mac via the help of VLC Media Player, you may check the below procedure.
- Of course, you have to download and install the VLC Media Player on your Mac.
- Once installed, get VLC Media Player’s icon to your Mac’s “Applications” folder. Launch the app afterward.
- Once opened, drag and drop the WMV or WMA file onto the main screen interface of the VLC Media Player.

And, that’s it! You should be able to open and access that Windows Media files on your Mac now! It’s just that if you are looking for advanced features, those are quite difficult to search in the interface of this freeware.
In case you are wondering if you can get Windows Media Player installed on your Mac, please take note that this is not possible as there is no Mac version available for Windows Media Player.
VideoLAN’s VLC
Some Mac users have experiences errors and failures when using the VLC Media Player during the process of how to play Windows Media files on Mac. With this, they might be interested in checking another third-party application that can also aid in the same process. VideoLAN’s VLC is a good option. The media player is currently available on many platforms, including Windows, Linux, BSD, macOS, iOS, Android, Windows Phone, Android TV, Apple TV, Tizen, and ChromeOS. It’s just simple to use it. Check out the below.
- Get the VideoLAN’s VLC downloaded and installed on your Mac.
- Choose the Windows Media file that you have, right-click on it, and choose the “Open With” option.
- From the list of the media players you have, choose VideoLAN’s VLC. You shall be able to access the file now.
Method #2. Using Parallels Desktop
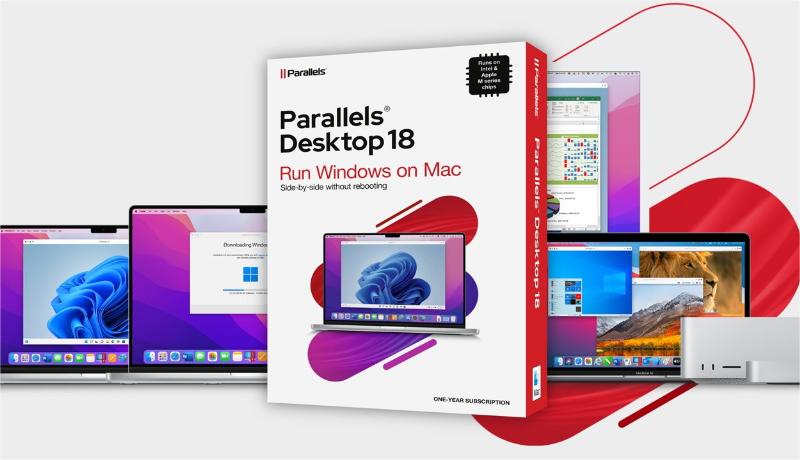
Using Parallels Desktop is also a good method to consider when it comes to finding out how to play Windows Media on Mac. Actually, aside from being able to run Windows Media Player virtually, you can also get to do that on any other Windows software package that you have on your Mac computer.

The Advantages of Parallels Desktop
- This can easily be installed on your Mac computer.
- There is a quick response rate during the emulating process of Windows programs.
- You will be able to run any Windows program on your Mac.
The Disadvantages of Parallels Desktop
- A Windows license will be needed.
- You would also have to get a yearly subscription to run it.
Part 3. Convert the Windows Media Files Via an Online Tool
Though the presented methods in the previous part are helpful enough, we still have another option that you can try. In the case of learning how to play Windows Media on Mac, you can actually try converting the files to a format that is supported by Mac OS. The use of online converters should work.
Convert.Files
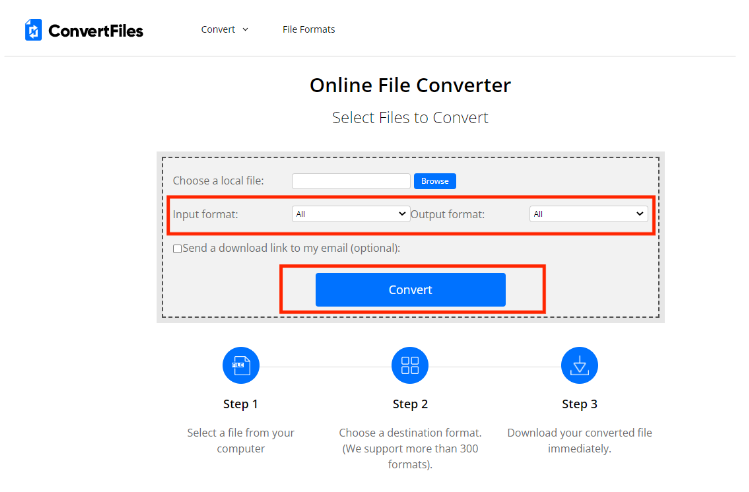
Surely, you will see lots of online converters on the web when you try looking for such with the ability to transform your WMV or WMA files. Convert.Files is one of them and one of the most popular. It can even convert batches of files at the same time. All you need is just to follow these steps.
- Once you arrived at its website, via the browse function, choose the Windows Media files that you have on your Mac.
- Define the input file format.
- From the numerous supported file formats, choose the output file format you’d like to use.
- Tap the “Convert” option next. Once the conversion process is over, get the transformed files downloaded.

Also, this website gives the user an option to get the link of the downloaded files. This should be sent via email. You just have to take note that though you can use its free trial offer, there are still limitations.
Part 4. Extra Tip: Downloading Apple Music Files
We knew that the information we have previously presented about how to play Windows Media on Mac already answered your queries and dilemmas. In this section, we just aim to share an extra tip when it comes to downloading and keeping your favorite Apple Music files with you. If you have been an Apple Music user, then this section will definitely benefit you.
Actually, Apple Music songs are protected by DRM making it quite difficult to access them on just any device or media player. They are also in formats that aren’t flexible enough. To deal with these issues, and be able to download the Apple Music files that you like for forever keeping, you then have to get these limitations eliminated. This can be done with the help of professional tools such as the TunesFun Apple Music Converter.
It is a tool that can aid in the Apple Music or iTunes DRM removal as well as in their conversion to formats playable on any device such as MP3. So you can set high-quality Apple Music songs as ringtones for free without any limit. This tool has also remarkable speed helping users save time.
Users should not also worry about losing the files’ original quality and information as all those will be maintained and kept. Whether you are using a Windows or Mac computer would not be a problem as well since this works perfectly fine with both. Technical support is also always available in case needed.
Now, in case you are wondering about the app’s interface, rest assured that this app was designed to let anyone be able to use it well – from beginners to professionals. For everyone’s reference, doing the conversion procedure via this app is easy especially if a guide is being used.
Step #1. Once the app has been installed on your computer, launch it and start by previewing or selecting the Apple Music songs to be converted and processed. Choosing several songs to be processed is possible since batch conversion is supported by the app.

Step #2. Select an output format to utilize. Modify the remaining output parameter settings (which can be seen at the bottom of the page) as well if you’d like to.

Step #3. Tapping the “Convert” button that is at the bottom-right corner of the screen will trigger the app to start converting the chosen tracks. The DRM removal process shall also be done at the same time.

Part 5. Summary
You now have finally learned how to play Windows Media on Mac. It is indeed amazing to find out that there are several methods of doing it. From the procedures we presented, you may select any that you feel would work for you. Additionally, if you are interested in downloading and keeping your Apple Music favorites, always remember that there are great apps such as the TunesFun Apple Music Converter that can help you out.
Leave a comment