The Detailed Guide Of How To Put A Picture On An iTunes Song
iTunes has been widely used by many as an app where one can play any media file. Additionally, it is also a big help when it comes to file organization and media management. If you wish to purchase songs, you can even get one from the iTunes Store.
What makes the purchased songs from iTunes more appealing is that when downloaded, they come with artwork or album covers. Unfortunately, when an error happened while downloading and the covers seem to be missing, you would feel like the tracks aren’t complete! And so, it would be helpful if you know how to put a picture on an iTunes song! Putting any artwork or cover that you like is possible.
So, if you are the same as the user above who’s asking how to add song artwork to iTunes, then read on to find out more information about this topic. We will now be exposing the easy method of it!
Article Content Part 1. How to Add Artwork to iTunes Songs Using Your Computer?Part 2. Bonus Information: Download iTunes and Apple Music Songs Without IssuesPart 3. Summary
Part 1. How to Add Artwork to iTunes Songs Using Your Computer?
In this part, we will be focusing on how to put a picture on an iTunes song if you are to use your Windows or Mac computer. To find suitable images, go to the band's website, its record label's website, Google Images, or Amazon. The detailed guide is highlighted below for your reference.
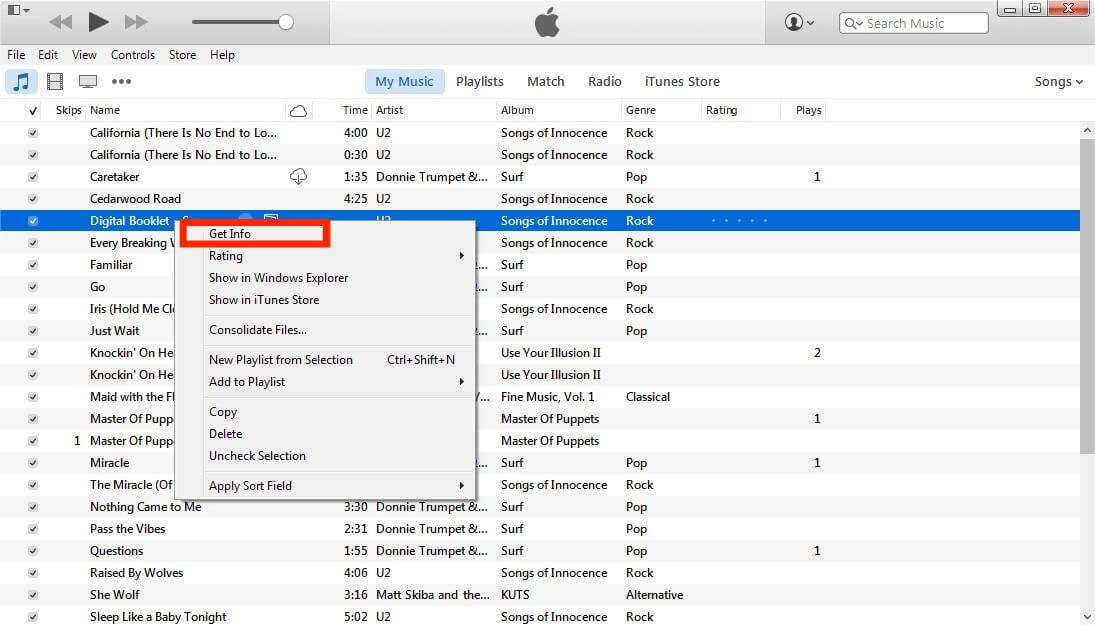
Step #1. Launch the iTunes app on your Windows or Mac PC. From the left side of the screen, you shall see several options. Choose the "Songs" option.
Step #2. All the songs on your iTunes library shall be displayed. Locate the track that has no artwork or cover. Select it and then choose "Get Info".
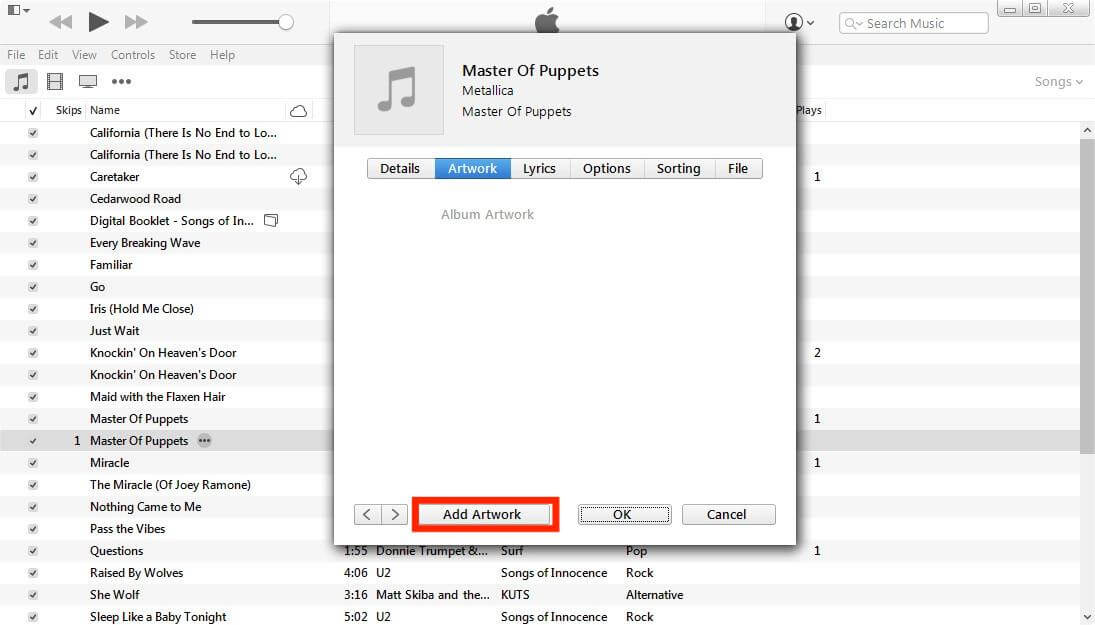
Step #3. Afterward, tap the "Artwork" menu, and then choose an image from your PC’s folder by tapping "Add Artwork".
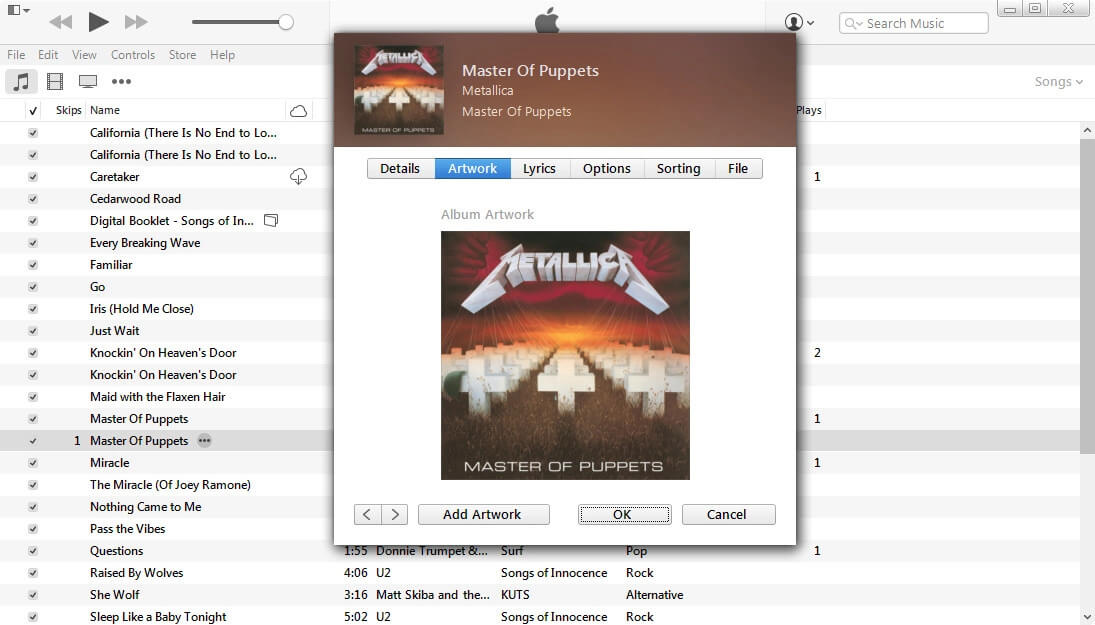
Step #4. To save the changes you made, tap the “OK” button.
And, that’s it! That’s how to put a picture on an iTunes song using your PC!
Sync the Changes to your iPhone
Now you learned how to put a picture on an iTunes song. To make sure that the songs’ artwork shall be updated as well as on your iPhone, you may want to accomplish the below steps.
Step #1. Using a USB cable, connect your iPhone to your computer.
Step #2. Once your iPhone has been recognized by iTunes, you shall see its icon on the left side of the screen. Tap it.
Step #3. From the options below “Settings”, choose “Music”.
Step #4. You must ensure that the checkboxes next to the “Sync Music” and “Entire music library” options must be ticked off.
Step #5. You shall see the “Apply” button. Click this. If the syncing does not start automatically, just tap the “Sync” button.
Part 2. Bonus Information: Download iTunes and Apple Music Songs Without Issues
This section of the article will just present bonus information since we have already discussed how to put a picture on an iTunes song in the first part.
If you are aiming to keep all your iTunes and Apple Music songs accessible on any device you own, you must ensure that they are free from protection and are converted to common formats that are playable on almost all devices. In this case, you have to depend on reliable tools such as the TunesFun Apple Music Converter.
The TunesFun Apple Music Converter can do the Apple Music DRM removal process as well as transform the songs to formats like MP3, FLAC, WAV, and other supported formats, making the songs playable on any device. For example, you can stream converted Apple Music songs on Linux, Windows computers, Alexa, PS4 and more media players.
It is fast and allows batch conversion while maintaining the songs’ original quality, metadata information, and ID tags. You can have this app installed on your Windows or Mac computer as this is supported by both OS.
In addition to the above, if you like streaming audiobooks, you can also use this to transform Audible books. To use the TunesFun Apple Music Converter when converting and downloading protected iTunes and Apple Music tracks, you may refer to the below.
Step #1. Preview and select the songs to be converted once the app has been installed and launched on your computer. Again, since this tool supports batch conversion, you may select bunches of songs to be processed in one go.

Step #2. Define an output format to use from the list of supported output formats. Once done, you can also hover over the bottom area of the screen to check and see all the other output parameter options. Those can be changed as you like. Don’t forget to set up an output folder location to use.

Step #3. Tap the “Convert” menu that is just at the bottom of the page to let the app start the conversion of the selected songs. The DRM removal process shall also be done by the app at the same time.

In a few minutes, expect that you will have the transformed Apple Music or iTunes songs saved on your computer. They are already DRM-free and so, you can have them accessed anywhere you want to.
Part 3. Summary
It is too easy to learn and do the process of how to put a picture on an iTunes song. If you happen to encounter the “missing artwork” error in the future, you can use this guide as a way to fix it. Moreover, if you are looking to save Apple Music or iTunes songs forever on any device that you like to use, don’t forget that TunesFun Apple Music Converter can be of great help to you!
 Home
Home
Leave a comment