How To Turn Music Into Ringtones: Guides And Procedures
These days, most things are nearly possible to have. Even making your favorite song your tune every time someone calls you is doable. This is why we are going to learn more about how to turn music into ringtones, here. We are going to figure out the methods of how can this be possible. With the presence of technology, it is now possible for you to choose your favorite song and set it as your ringtone!
Well, technically as long as your chosen song or music is saved or available on your device, it is possible to use them as your ringtone. However, in case you are using an online music platform such as Apple Music, things can be a little difficult to handle because of the DRM encryption that is applied to these songs. So, how to turn music into ringtones, and what should we do to make it possible?
Article Content Part 1. How to Make Your Own Ringtone from a Song Using iTunes?Part 2. How to Set Any Apple Music Tracks Into Ringtones?Part 3. To Summarize It All
Part 1. How to Make Your Own Ringtone from a Song Using iTunes?
One of the most common resources that a user can use is iTunes. To start, you have to prepare a song that you have desired to use as your ringtone. Well, in this case, it is not possible to use a song from Apple Music since these songs are protected by DRM or copyright. Before starting, you have to make sure that you have the latest version of iTunes installed on your device. Then start by tapping the Start Menu, and doing the following procedures.
- Tap File and then choose Add File to Library or Add Folder to Library.
- Browse within the folders and the files to be able to begin the importing of files.
- Once you are in the library, tap the album where the song or the audio file is located or stored. Right-click on it and then choose Song Info.
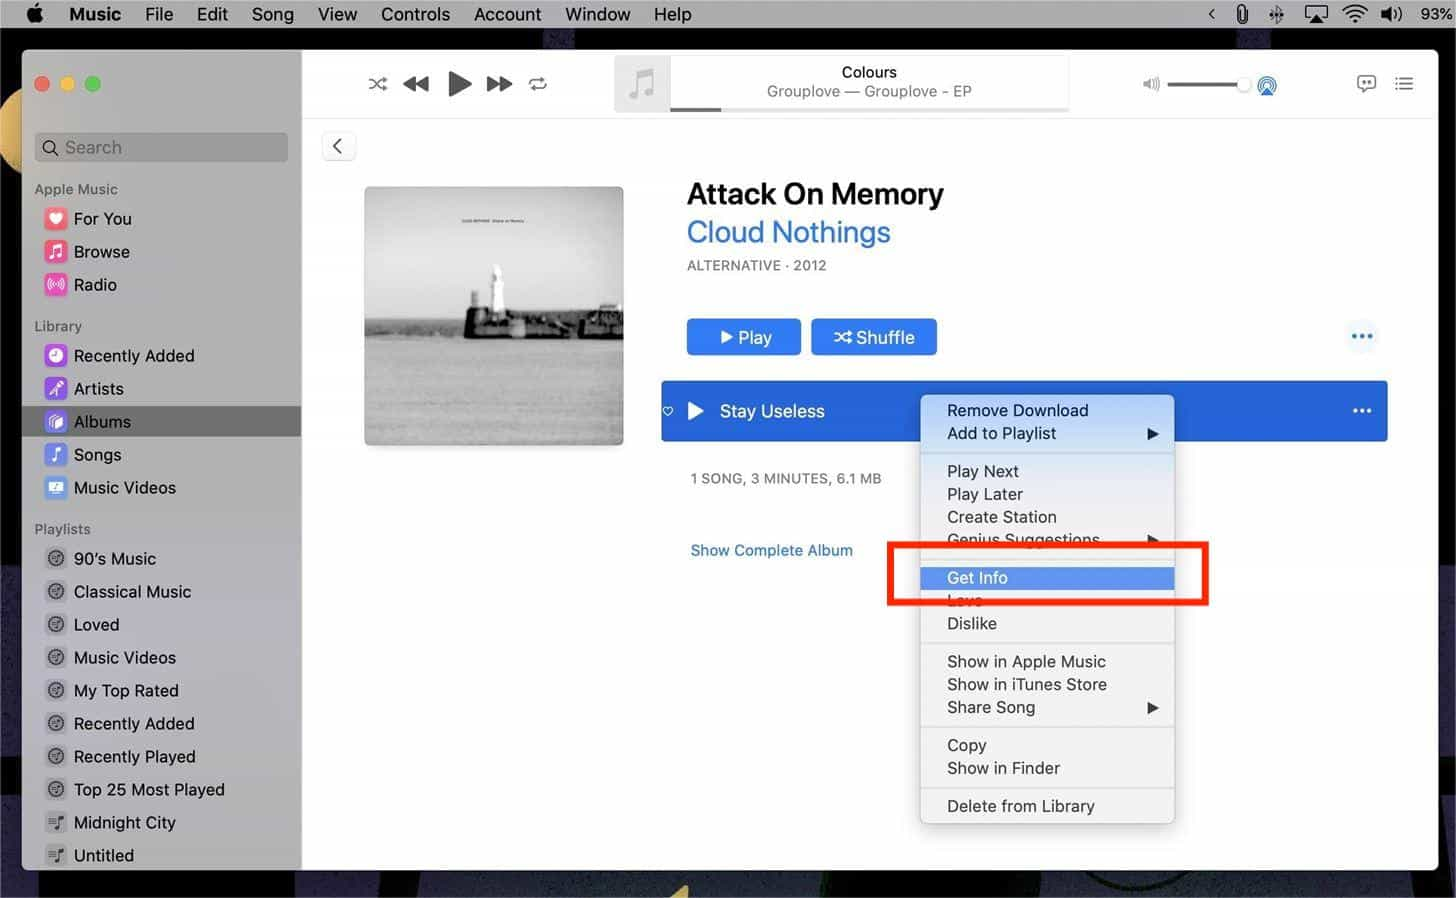
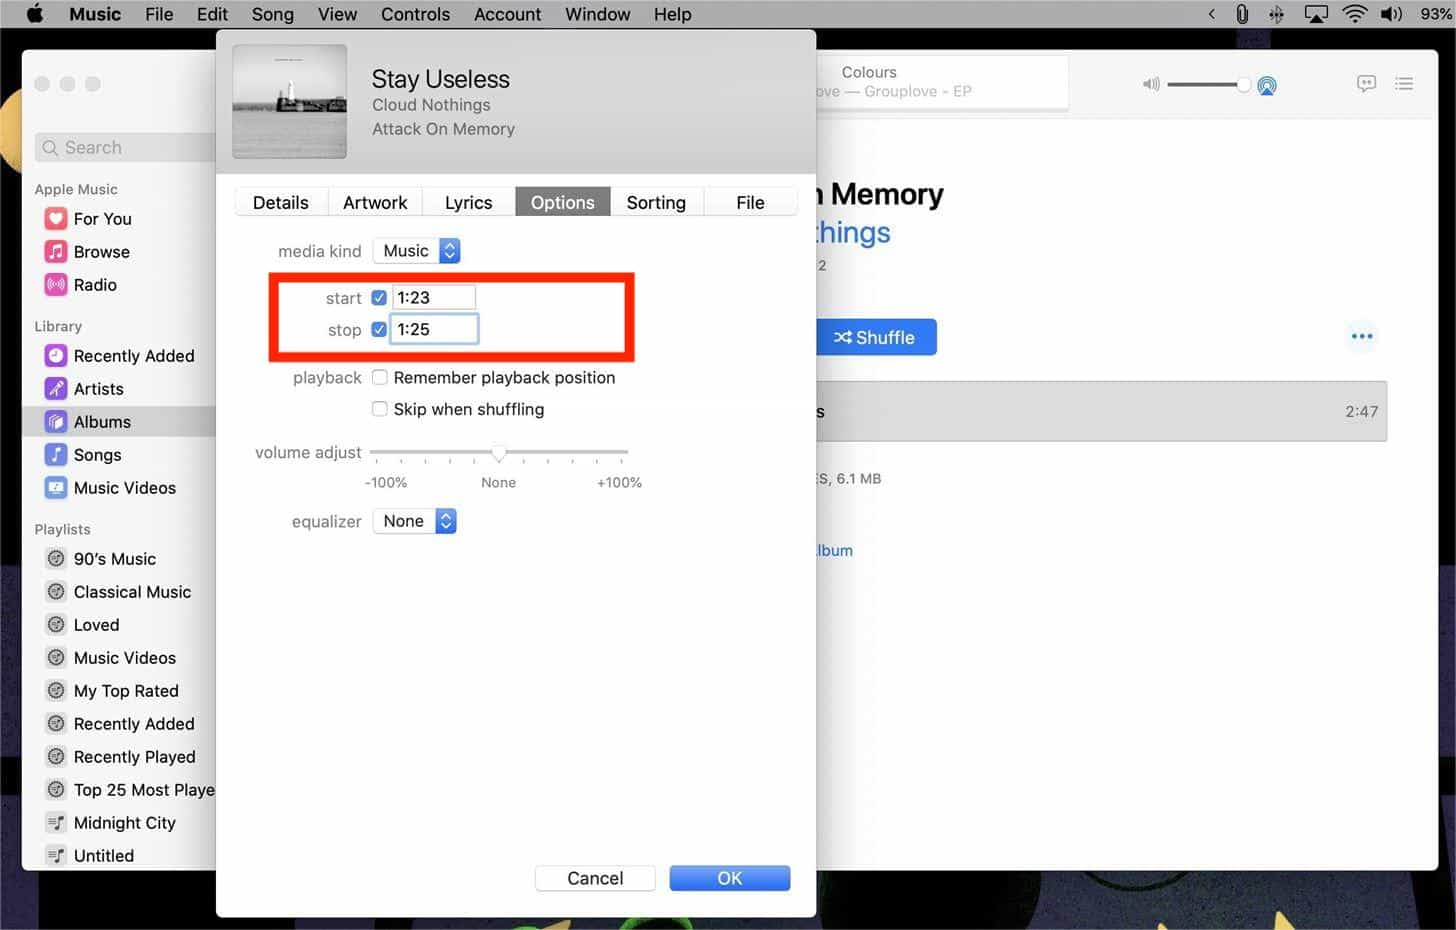
- Then a new window will open, and you have to choose the Options tab. Go and tick the Start and Stop boxes, and type in the time or moments that you wanted the ringtone to start and stop. In case you wanted to have the song from start to its beginning then there is no need for you to tick on the boxes.
- Click Ok once you have set the start and stop times on the boxes.
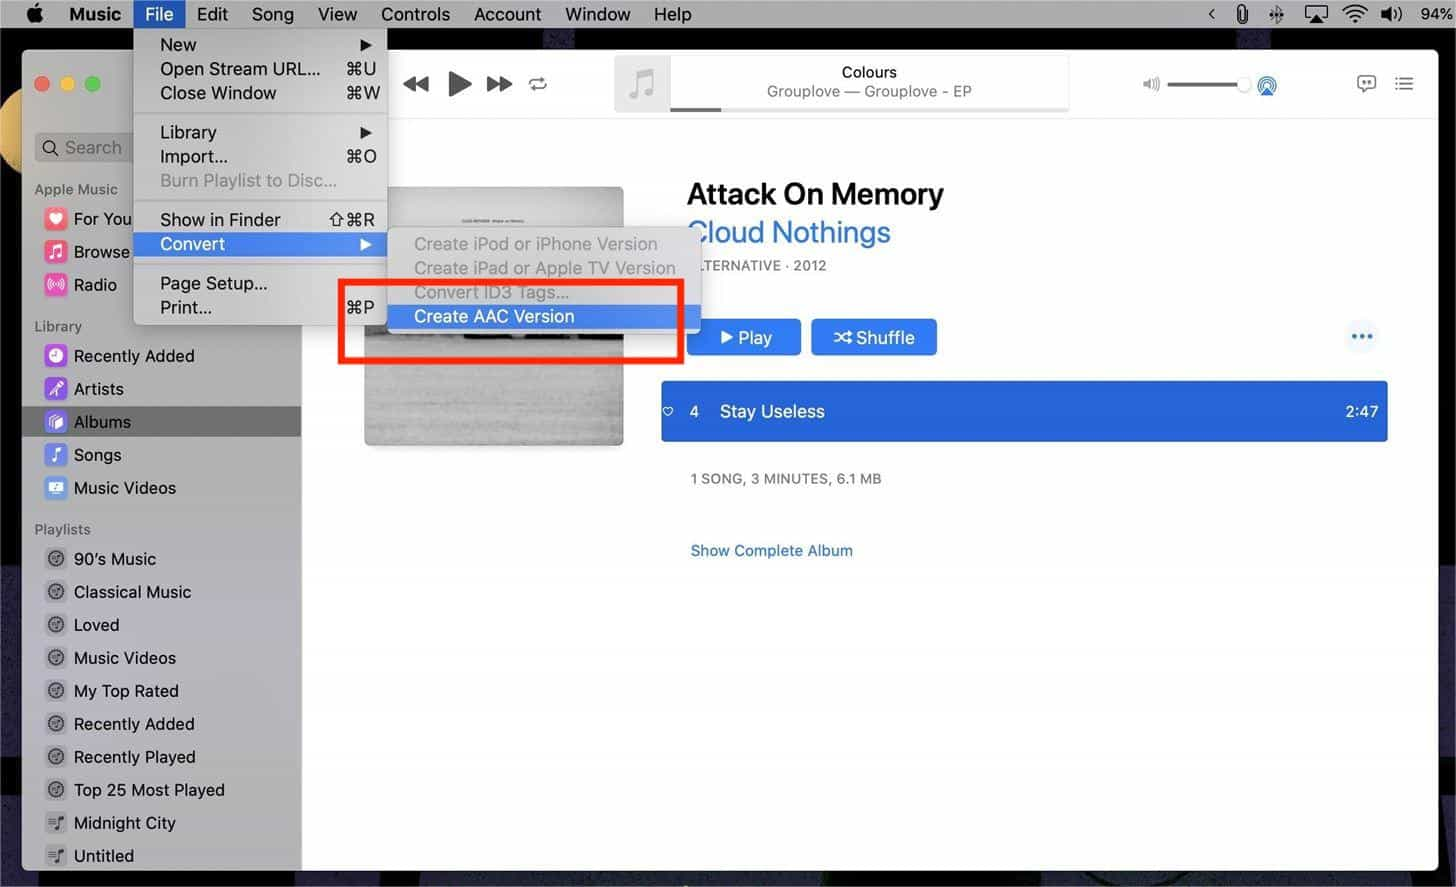
- Choose the file or the song by clicking it once, and then go to the File Menu.
- Tap Convert, and then choose the Create AAC version option. The iTunes app will only save the start and stop sections that you have set from the procedures or steps. In case you cannot see the option to Create an AAC version, it can be because the rip settings of the CD are not correct. In order to alter this, tap the Edit Menu and then tap Preferences > Import Settings which is next to the “When you insert a CD” option > AAC encoder.
- Right-click on the song in the album and then tap the Show in Windows Explorer option. If you are using a Mac, you can see this option as Show In Finder.
- Then you will be asked if you want to change the extension, you have to tap Yes on Windows and then choose Use .m4r on your Mac. You have to click Yes when you are asked if you wanted to change the extension.
In case the song that you have chosen is tagged with the artist and album information, then the new track will be available as a duplicate on the same album. The identification can be easily done by having your focus on the duration of the song. If the info of the artist and the song is not available, then you will see a new album in the library where this single track is saved.
And there you are you just have to sync the files on your iPhone! And you have to make sure that you are using the latest version of iTunes to be able to continue.
Part 2. How to Set Any Apple Music Tracks Into Ringtones?
Of course, the ones that we wanted to have as our ringtones are our most wanted and loved songs. This is the main reason many people wanted to learn about how to turn music into ringtones. However, one of the main concerns of music lovers is the accessibility and availability of the songs that they wanted to have as ringtones. Since these songs are from Apple Music, there are many restrictions that hinder music enthusiasts to have a hold of these songs and use them.
To users of Apple Music back then, it is not a new thing to know that music tracks saved on this platform are protected files. There is no easy way to get into these music tracks unless you are a paid subscriber of Apple Music and you are using an Apple device or an Apple-authorized one. Well, it is one of the best features of Apple Music especially if you are a digital creator, it protects your original files from illegal sellers and distributors. But what if you are going to use it for personal gains only such as setting it up as your own ringtone? How to turn music into ringtones in Apple Music?
What's more, using the Apple Music app might encounter some issues, such as Apple Music won't download songs, Apple Music songs not being available in the region, or Apple Music shuffle playing the same songs. Rather than be burdened with what you have to do once an issue with your Apple Music account is encountered, why try a way to just download the Apple Music songs you like to stream without worrying about anything?
We have something that can help you with it, and it is called the TunesFun Apple Music Converter. This professional tool is efficient and can be considered one of the most sought-after partners in terms of converting your files into flexible file formats. Aside from being able to convert your music files, the TunesFun Apple Music Converter can also get rid of the DRM encryption that is adopted by Apple Music tracks. The process of removal comes in handy while the tool is in the process of converting your files into formats like MP3, MP4, AAC, AC3, AIFF, FLAC, WAV, and a lot more.
Aside from being handy when it comes to file conversion, this tool is also efficient. If you love saving time this one is for you! The TunesFun Apple Music Converter can convert your files faster than you have imagined. It can convert music files faster than other tools which is why it is preferred by many music lovers. And the best thing about the fast rate conversion of this professional tool is, the quality of the files will never be compromised! The user can still enjoy the hundred percent same as the original file feels once the output is out for usage! You also get to keep other information about the music files such as metadata and ID tags!
The steps for using the tool are also simple and easy to manage. To help you use the tool and have your music files as resources on how to turn music into ringtones, let us see the steps of using the TunesFun Apple Music Converter below.
Step 1. To start the process, download and install the professional tool on your personal computer. Once completely installed, open the tool and choose the Add Files option to import the music files for file conversion. It is also possible to use the drag-and-drop method or you can also copy the URLs of the files if you wanted.

Step 2. Select the format of the output file that you need or want and then create a folder where all the files will be stored once the conversion process is fully done.

Step 3. Choose the Convert tab, and wait until the whole process is completed. You can also see the status of the conversion at the main interface of the tool in case you are curious.

In no time, you can now have the songs that you can use as your ringtones every time someone will call you!
Part 3. To Summarize It All
The process of how to turn music into ringtones can be really tedious. This is why it is understandable that people look for other ways they can access songs easily so they can use them for the purposes they have, given that they are for personal use only. It is a huge convenience that we have tools like the TunesFun Apple Music Converter which made every step easier and simpler to follow and do.
 Home
Home
Leave a comment