Best Way about How to Convert iTunes AAC to MP3
iTunes is one of the most widely used platforms and it can convert iTunes AAC to MP3. Well, we just can’t blame the people for doing so as indeed, iTunes is a great app to utilize. From being a media player to a file manager and organizer, one would surely be delighted to always use it.
The tracks that we can buy from iTunes are encrypted in AAC format. Thus, if you have bunches of AAC collections that you’d like to access and listen to via other platforms or devices, learning about iTunes AAC to MP3 format conversion would then be vital.
Learning how to convert iTunes to MP3 is not enough. Some people are probably thinking that using online iTunes AAC to MP3 converters could work.
Though there are indeed bunches of these on the web, there is no guarantee that the success rate would be high as most of them aren’t equipped with the ability to bypass the DRM encryption of the protected iTunes files. Thus, it would be good to find out more about the best tools that can perfectly complete the process.
Let’s then get started with the discussion.
Article Content Part 1: An Overview of Protected iTunes AAC Audio FilePart 2: The Official Method of Converting iTunes AAC Files to MP3Part 3: The Best Way to Convert iTunes AAC to MP3 FormatPart 4: Summary
Part 1: An Overview of Protected iTunes AAC Audio File
The audio files that you can get from both iTunes and Apple Music are protected AAC files. It is worth mentioning that those tracks brought from the iTunes Store before the year 2009 are protected as well as all those that are from Apple Music.
This DRM encryption is responsible for keeping contents protected from illegal use, distribution, modification, or unauthorized access. Thus, it really makes sense that you can’t play protected iTunes and Apple Music songs on some other devices.
If you have bunches of songs in your iTunes library but are not sure how to identify if they are protected or not, checking their song info would be the way out. Here is how you can do it.
Step #1. Open your iTunes app and then head to the “Music” section.
Step #2. From the list of tracks, select one that you’d like to check and then right-click on it.
Step #3. Options shall be shown. Select the “Song Info” menu and then move to the “File” tab. Under “Kind”, the song’s file type should be shown.
Since you now have brief knowledge about protected iTunes AAC audio files, let’s move forward and check how we can finally accomplish the iTunes AAC to MP3 format conversion.
Part 2: The Official Method of Converting iTunes AAC Files to MP3
Luckily, the iTunes app itself offers a direct and official method of completing the iTunes AAC to MP3 format conversion process. If you’d like to try this method, we have the tutorials presented in this section for both Windows and Mac users.

For Mac Users
Step #1. On your Mac, begin by launching the iTunes app. From the top section, tap the “Music” menu. Choose “Preferences” next.
Step #2. You now have to tap the “Files” tab and then press the “Import Settings” button afterward.
Step #3. On the “Import Using” tap, there is a drop-down icon. Click it and once the selections are shown, choose “MP3 Encoder”.
Step #4. Via the “Settings” menu, you can also set up the audio quality that you prefer using.
Step #5. It is now time to select the tracks to be processed.
Step #6. Hit the “File” menu at the top area of the screen. Choose “Convert” and finally, select the “Create MP3 Version” option.
All you need to do now is to wait until the iTunes AAC to MP3 format conversion is completed. Once done, the MP3 versions of the processed songs shall be next to the original files.
For Windows Users
Step #1. On your Windows PC, open the iTunes app and immediately press the “Edit” menu at the top. Choose the “Preferences” option next.
Step #2. Under the “General” tab, hit the “Import Settings” button. You just have to do the same steps that were previously mentioned when using a Mac computer.
Finding the Converted MP3 Tracks Faster
Upon accomplishing the iTunes AAC to MP3 format transformation, you are probably wondering if there would be a faster way to see the new files. Of course, there is!
What you have to do is just sort your iTunes library (Music) by “Date Added”. All the MP3 versions that were just processed will be listed together. It is recommended that you create a new playlist wherein these MP3 versions shall be saved. Of course, you can name it as you like.
Though using the iTunes app during the process of iTunes AAC to MP3 format conversion is totally convenient, it is important to mention that the output files’ quality won’t be the same as the original files.
Some data will be lost which would reduce the sound quality of the output files. But the good thing is that they are relatively smaller in size compared to the original ones. Thus, giving more room for you to utilize.
Part 3: The Best Way to Convert iTunes AAC to MP3 Format
As previously mentioned, in order to ensure a smooth iTunes AAC to MP3 format processing, it is always recommended for users to rely on professional software apps. Now, in this case, it would be good to know more about the TunesFun Apple Music Converter which is one of the most recommended apps when it comes to file conversion.
We were already briefed about the DRM protection that AAC files contain. And, in order to get rid of it, a tool that has the power to bypass DRM should be used. Fortunately, we got TunesFun Apple Music Converter on our side.
The good thing about using the TunesFun Apple Music Converter is that aside from having the capability of doing the DRM removal process for Apple Music, it can also aid in protected iTunes and Apple Music songs’ conversion to formats like MP3, FLAC, WAV, M4A, and more.
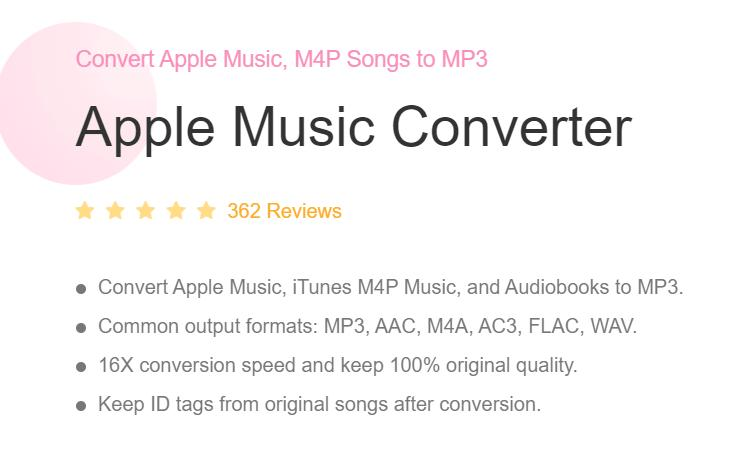
In fact, while using this tool, one can ensure that the output files will have the same quality as the original ones and that their ID tags and important details will be maintained and preserved.
With the TunesFun Apple Music Converter’s fast conversion rate (16x), the processing is guaranteed efficient for the users. Plus, one can even do batch conversion. Thus, if you are looking at processing bunches of tracks in one go, relying on TunesFun Apple Music Converter won’t be an issue at all.
Additionally, if you happen to be fond of listening to audiobooks, you may even take advantage of this tool as it also supports audiobook conversion.
If you are wondering if it would be hard to install this tool on your PC, you don’t have to. This is compatible with both Windows and Mac OS so getting this up and running on your computer won’t be a problem at all! Since this app was designed with simple UI and navigation functions, one would not face any trouble when using it.
Upon reading the above descriptions and you seem to like using the TunesFun Apple Music Converter when it comes to the process of transforming iTunes AAC to MP3 format, you may use the below guide as your reference throughout the process.
Step #1. Once the TunesFun Apple Music Converter has been installed on your PC, open it and begin to preview and select all the iTunes and Apple Music songs that you desire to process. Again, since batch processing is supported by this app, choosing a number of tracks won’t be an issue at all.

Step #2. Select MP3 from the output format selections (as we are aiming to perform iTunes AAC to MP3 format conversion). Also, the output parameter options at the bottom of the screen can be modified as you like. Don’t forget to set up an output folder location to use.

Step #3. Hit the “Convert” button once you’re all ready. The transformation of the selected AAC files shall begin right away. While this is ongoing, the DRM protection removal shall also be done by the app at the same time.

In a few minutes, you will have the MP3 versions of the AAC files that were processed – saved on your PC, already free from DRM! If you’d like to access them on any gadget or media player, you are now free to do that!
Part 4: Summary
In order to accomplish the iTunes AAC to MP3 format, it is always recommended that we use professional tools like the TunesFun Apple Music Converter. Software apps like this are very much capable of completing both the conversion and the DRM removal procedures in a seamless manner. The output files will also be guaranteed to be of high quality!
 Home
Home
Leave a comment