Learn The Methods Of Connecting Spotify To Chromecast Here!
Google Chromecast, is known to be a device that you can use to connect the HDMI of your TVs in order to enjoy cast media (like YouTube, and even photo slideshows) that can be from your computer, phone, or tablet and then to your TV. If you wanted to turn an ordinary TV into a smart one, this is one of the wisest things to do.
And of course, you can also connect to Spotify on this device to be able to enjoy a vast library of music files a lot of people would definitely enjoy! Imagine being able to convert your TV into a jukebox, where you can sing all your most loved songs with your friends and loved ones. In order to start connecting Spotify to Chromecast, there are lots of things that you have to do and prepare. In this article, we are going to give you an idea of how you can enjoy Spotify on Chromecast.
Article Content Part 1. How to use Chromecast with Spotify?Part 2. Listen to Spotify Music Tracks on Any Device at AnytimePart 3. To Summarize It All
Part 1. How to use Chromecast with Spotify?
Google Chromecast is a line of digital media players you can use to send internet-streamed audio-visual content from one device to view on your big screen. Using your smartphone or computer as a remote control, you can use Chromecast to access video content from Netflix, YouTube, Hulu, and other services. You can also use it to stream almost any kind of content from the Chrome browser on a laptop or desktop computer.
When you don’t want to listen to music through headphones, Your TV or TV soundbar is probably the loudest speaker you own. Happily, Spotify is easy to use with Chromecast! One of the things that you have to remember before connecting Spotify to Chromecast is to make sure that Chromecast and your device are connected to the same Wi-Fi connection. You can use a tablet, a phone, or a computer. Let us see the steps on how are we going to connect Spotify to Chromecast below.
Step 1. Set up Your Chromecast Device
- Plug your Chromecast device into one of the HDMI ports on your TV and tune to that HDMI input channel.
- Chromecast is managed through the Google Home app, so install the "Google Home" app for your Android or iOS device. Then log in with your Google account.
- Choose the plus sign in the top left corner of the screen.
- At the top of the menu, under "Add to home," tap "Set up device."
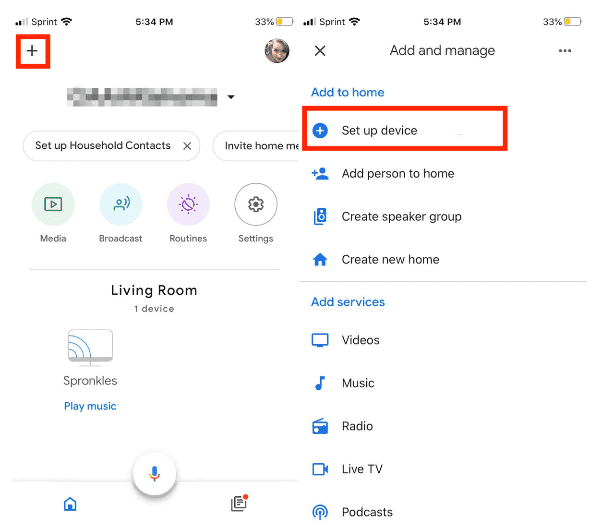
- Tap "Set up new devices" to bring up the prompts to finish setting up your Chromecast.
- The app will now search for nearby Chromecast devices. A code will appear on your TV, and confirm that it's the same one displayed on your phone, then continue.
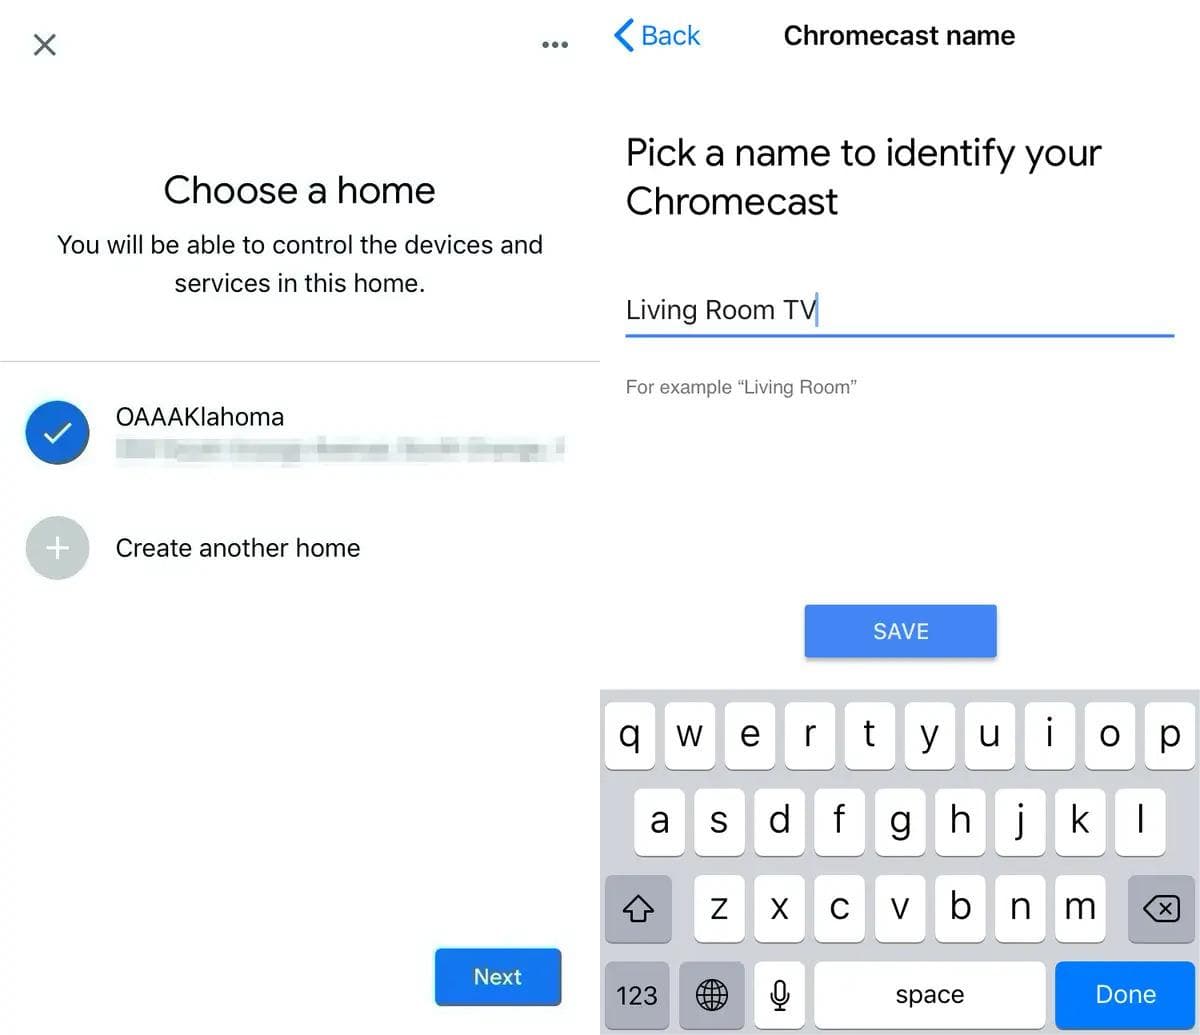
- Next, choose which room your Chromecast is in on the app.
- Assign a name to your Chromecast.
- Now it's time to introduce your Chromecast to your Wi-Fi network. In the list, choose the Wi-Fi network you want to connect to.
- Done! Now that you have set up your Chromecast.
Step 2. Chromecast Spotify from Your Smartphone
Once your Chromecast is ready, you can start connecting Spotify to Chromecast!
- Launch the Spotify app on your Android or iPhone.
- Select the album, playlist, or songs that you would like to cast, and then start playing them.
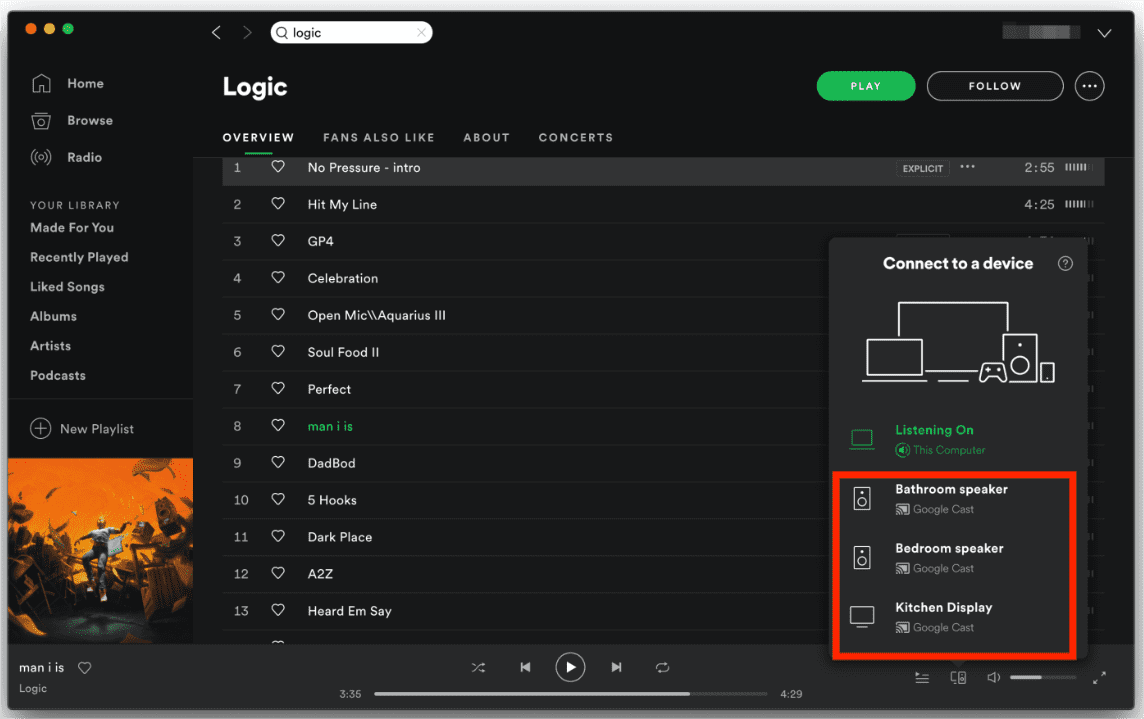
- At the bottom part of the screen, click the devices button.
- Then you will see a list of the many possible ways that you can stream songs. Select the Chromecast device based on how you have set it in your Google Home.
- Now your Spotify music will be cast to your TV.

The way of connecting Spotify to Chromecast via desktop is similar to using a mobile device. Start playing the song you want in the Spotify app on your computer. The “Devices” icon is at the lower right part, tap it and then choose the name of your Chromecast device. When casting to your Chromecast device, your music should start playing after a few seconds. You’ll then be able to remotely control Spotify from your device.
Part 2. Listen to Spotify Music Tracks on Any Device at Anytime
Spotify has been continuously making great efforts to be able to give its customers the type of music they deserve. Now that we have learned some ideas on connecting Spotify to Chromecast, it is now also a given that we have to learn wiser ways to access the songs we love to listen to.
Although free Spotify users can use Spotify Connect with Chromecast, we all know that advertisements in the free service can be intrusive while streaming music on your Chromecast device. And, you get a miserly 96kbps or 160kbps audio quality at best, which is chronically inadequate for any musical enjoyment.
That became the reason why the emergence of professional tools like the TunesFun Spotify Music Converter. This professional tool has escalated the ways a user can access and listen to tracks from Spotify given that there could be restrictions and limitations along the way. In order to have ourselves familiar with what the TunesFun Spotify Music Converter can do, we have collated some of the notable features a user can make as their references.
- Convert your files to a lot of file formats that are a lot more versatile and flexible, including MP3, FLAC, AAC, and WAV. One of the famous formats when it comes to being universal is MP3. Once the music files have been converted to flexible formats, access will never be too difficult anymore.
- Get rid of DRM encryption from Spotify tracks. Sharing, exporting, transferring, or playing music on your devices is easy. No more need to upgrade to Spotify premium.
- The user can enjoy very good-quality music files once the conversion is fully finished! There is also a possibility of keeping vital information such as ID tags and metadata.
- 5X conversion speed. The process of the file conversion would not take too long.
The interface of the TunesFun Spotify Music Converter is easy to understand and is not complex. Anyone can freely use the professional tool without too much confusion. The steps on how to use the tool are also easy to follow, let us have a look at them below.
Step 1. It is a must that you have to download and install the TunesFun Spotify Music Converter on the computer that you are going to use.
Step 2. Once the tool has been completely installed, launch it and begin adding all the music files that you have to convert. If you wanted to have a lot of files to be converted by the tool, the TunesFun Spotify Music Converter also supports multiple file conversion.
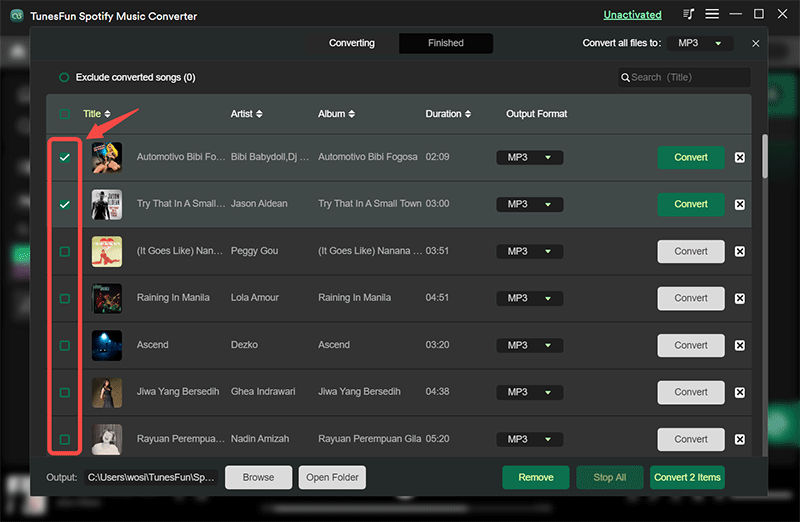
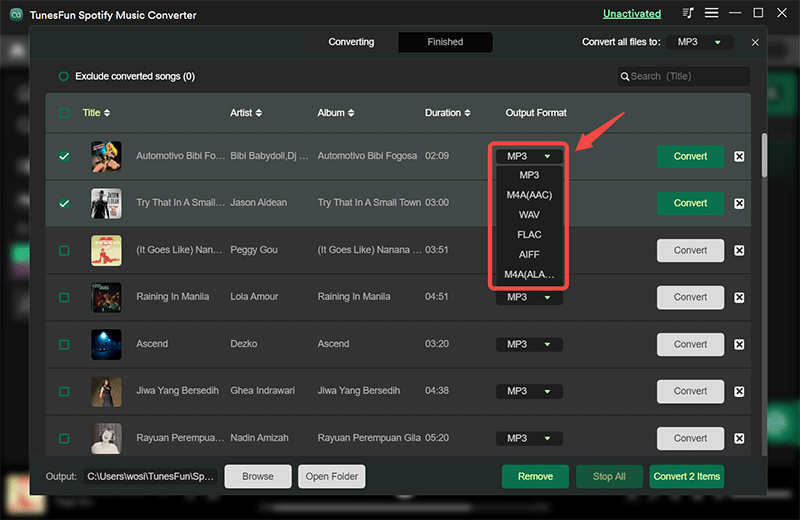
Step 3. Once all the songs have been added, you can now select the formats of the music files that you wanted to have as your output. You can choose from all the formats that the TunesFun Spotify Music Converter is offering. Then you also have to make a folder to serve as the home of the files once the conversion has been finalized.
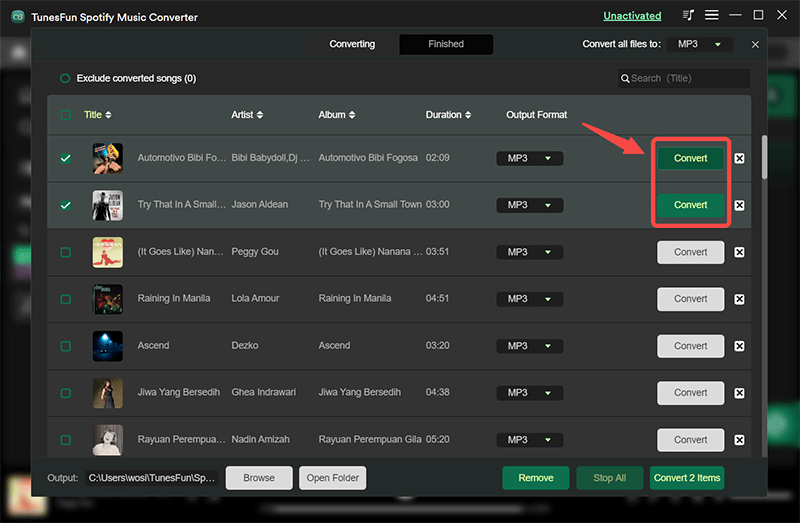
Step 4. Then, hit the Convert tab, and wait for a few time until the TunesFun Spotify Music Converter has finalized the conversion of all the music files that you have added. If you wanted to have a close look at the status of the conversion of the files, you can see it at the interface of the professional converter.
After a few minutes, you will have the converted songs and playlists saved on your PC. Suppose you wish to push with the cancelation of your subscription, you can still keep your Spotify favorite music.
Part 3. To Summarize It All
If you wanted to have many fun nights or even days with your music you have to make sure that you explore ways to access these music files. The chance to have known the process of connecting Spotify to Chromecast can be really essential.
In case you do not have Chromecast, it would still be essential to have additional learning on how can you enjoy listening to music wherever you may be. It is also such a nice opportunity to have known a lot of ideas about TunesFun Spotify Music Converter since this tool can be your future partner in making sure that nobody is left behind when it comes to accessing and listening to songs they love in their content.
 Home
Home
Leave a comment