

Solved: Where To Cancel Spotify Premium Subscription
Spotify, being one of the leading platforms when it comes to music streaming, definitely has one of the top spots if we are to rank all platforms. In fact, it has over 400 million active streaming including the free version users. Among those, more than 180 million own premium accounts. If suddenly, for any reason that you have, you get tired of your Premium Spotify account, you should know where to cancel Spotify premium. That is what we are about to share here.
Apart from offering a free version to its users, Spotify is also known to offer several tiers of paid subscription plans. Lots of users find great perks in being subscribed to a premium plan. However, there could be others who would wish to switch to another platform such as Apple Music and the like, or just utilize the free version rather than pay monthly fees. To avoid excessive billing, finding out where do you go to cancel Spotify? premium is truly helpful.
Before we get to move on and see how to cancel Spotify premium and how it can be done, let’s first discuss in the first part those important things you should be aware of before you go ahead and cancel your subscription plan.
Article Content Part 1. Important Things to Know Before Canceling Your Spotify Premium PlanPart 2. How to Cancel Your Spotify Premium Subscription?Part 3. How to Keep Your Spotify Favorites Forever?Part 4. Summary
Part 1. Important Things to Know Before Canceling Your Spotify Premium Plan
It is vital that you know what would happen once you cancel your Spotify Premium subscription before finding out how the cancelation can be done. But if you aren’t interested in these things, and you have fully decided to proceed, you can just jump into the second section as information relative to where to cancel Spotify premium is presented there.
Keep in mind that when you decided to cancel your Spotify Premium subscription, you are free to rejoin anytime you want to. However, if you have thought about it already and would wish to keep using the app via the free version, remember that a huge difference in the services will be experienced.
When your premium plan has been canceled, your account shall automatically turn into the free version. During streaming, ad pop-ups will always be there! Some users find these ads annoying. Free users have no way to skip such.

One of the most loved advantages of having a Premium account is the ability to listen to Spotify songs in offline mode. Once you have your subscription canceled, this will be gone. Streaming under the free version can only be done as long as your device is connected to a Wi-Fi or cellular data network.
Downloading songs won’t any longer be possible. If you had downloaded bunches of Spotify songs before already, all those will be gone the moment you switched to the “Freemium” plan as you actually haven’t bought them for use outside the app so accessing them without the premium plan isn’t possible.
Apart from the above, it is also significant that you know that when canceling during the active period of your current plan, it won’t happen right away as you wish. You would have to wait until the current billing period is over. If you weren’t able to cancel it before it gets renewed, you should expect that you’ll then be billed again. Upon reading the above, and you would still wish to push through and find out where to cancel Spotify premium, you must then move to the next part to know the details regarding the cancelation process.
Part 2. How to Cancel Your Spotify Premium Subscription?
Finding out where to cancel Spotify premium is actually easy. In fact, you can do the procedure using your Windows or Mac computer or via your handy devices such as your Android or iOS gadgets. Check out the steps you have to accomplish.
Canceling Spotify Subscription on Windows PC
Step #1. On your device, head to Spotify’s official website. Log into your account using your account credentials – username and password.
Step #2. Tap your user profile. From the options displayed, tap the “Account” option.
Step #3. You have to scroll down until you find the “Subscription” button. Once tapped, you shall see the “Change or Cancel” button.

Step #4. Your account will be switched to the free version once you confirmed the cancelation (after tapping the “Yes, Cancel” menu).

Canceling Spotify Subscription on iOS Device or Mac
As you have read above, canceling your premium plan via the website is indeed very easy to do. But you should know that doing that is also possible through the “Settings” menu on your Apple devices or using the App Store on your Mac. You may refer to the below for further details.
Using iPhone, iPod Touch, or iPad
If you wish to use your handy Apple devices such as your iPhone, iPod Touch, or your iPad, all you need is to follow the below steps.
Step #1. On your Apple device, head to the “Settings” menu. Click your account photo and you shall notice a pop-up window.
Step #2. Under your Apple ID, you just have to click “Subscription”.
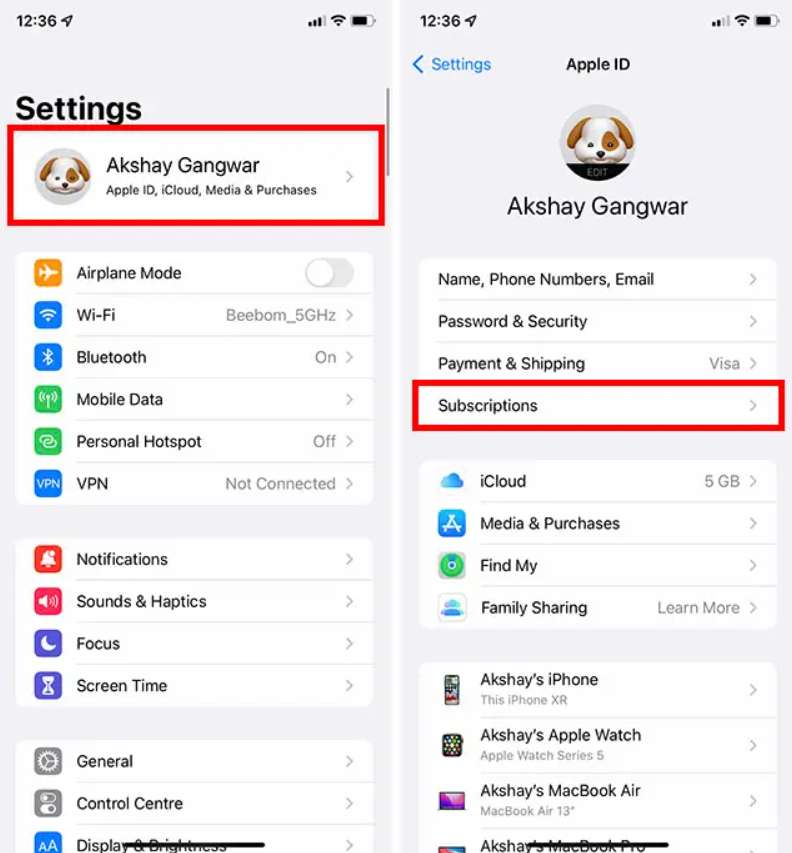
Step #3. From there, look for “Spotify Subscription”. You just have to select the “Cancel Subscription” menu. When prompted, you just have to confirm the cancelation to proceed.
Using Mac
If you prefer using Mac, here is where to cancel Spotify premium.
Step #1. Using your Mac computer, open the App Store. At the bottom of the sidebar, you shall be able to see the “Account” button. Click this option.
Step #2. Tap the “View Information” menu that is just at the top of your screen. You will be required to sign into your Apple ID with your account credentials. Just proceed as needed.
Step #3. Scroll until you see the “Subscriptions” menu. Click on it, and then choose the “Manage” option.
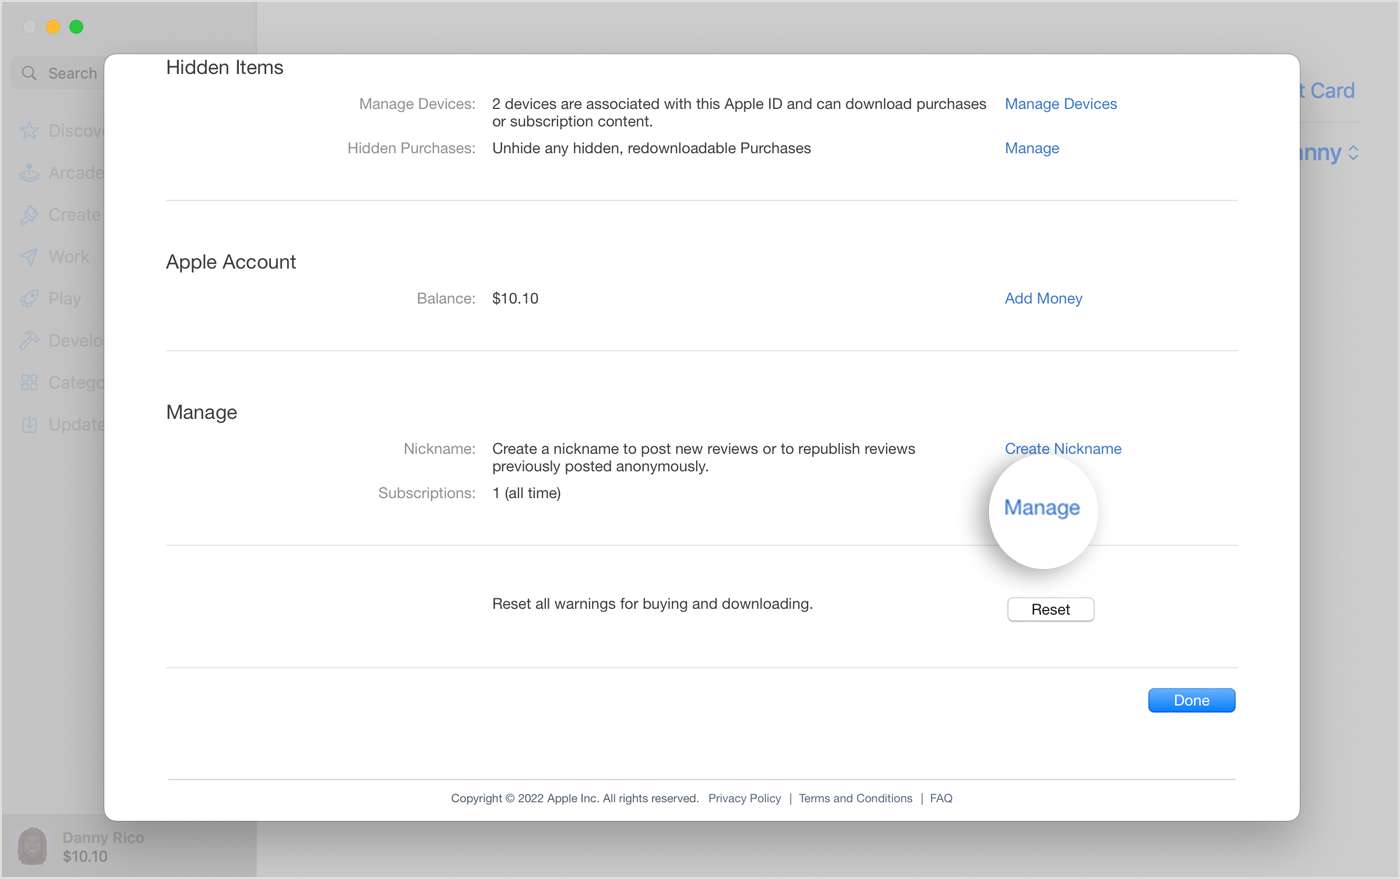
Step #4. Tap the “Edit” menu next that should be at the left of your subscription. Afterward, select the “Cancel Subscription” option.
Once you have finished doing the above, your account shall automatically be changed to the free version. Again, you won’t any longer be able to enjoy all those perks that you have experienced during the time you are subscribed to one of Spotify’s paid plans (as also mentioned in the first part).
Part 3. How to Keep Your Spotify Favorites Forever?
Indeed, knowing where to cancel Spotify premium is good especially if you have really decided to proceed. However, surely, you are still thinking of the best ways to keep your favorites. Is there a way you can do so?
Well, you might be surprised but yes, there is an easy way for you to keep all your loved Spotify songs, albums, and playlists playable and accessible on any device you like to use even without a Spotify Premium subscription. All you need in this case is to have the most powerful and reliable app – the TunesFun Spotify Music Converter.
Does Spotify cost money now? No. The TunesFun Spotify Music Converter is a professional software app that can help you download all those Spotify songs that you like as it can remove the DRM protection of the songs and convert them to flexible formats like MP3, WAV, AAC, and FLAC. It has a fast conversion speed and even does lossless conversion. With this, you can ensure that you’ll be getting high-quality outputs with preserved ID tags and metadata information.
The app is also being updated timely so you can rest assured that you’ll be getting the best services consistently! The app is also user-friendly. Anyone will be able to use it even beginners! Here is a quick overview of how the conversion and downloading of Spotify songs can be done through the TunesFun Spotify Music Converter.
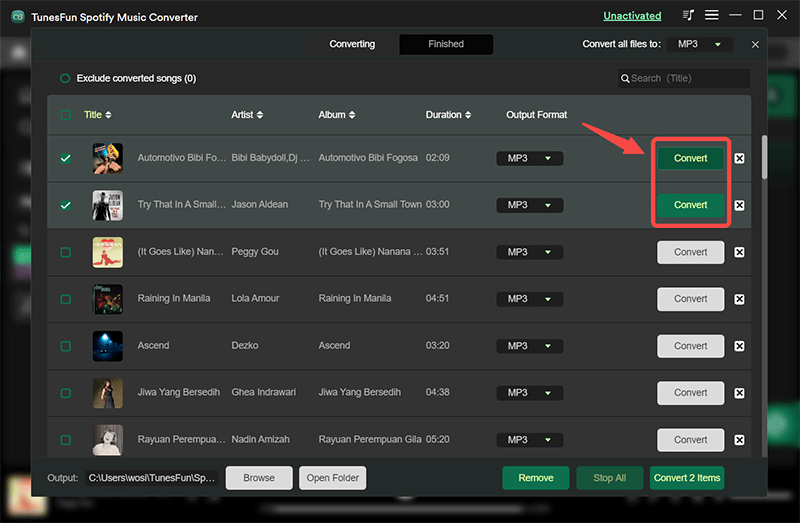
Step #1. Install the TunesFun Spotify Music Converter on your computer. Launch it right away. On the main screen, you should be able to upload the tracks by dragging and dropping them. Using their URLs should also work.
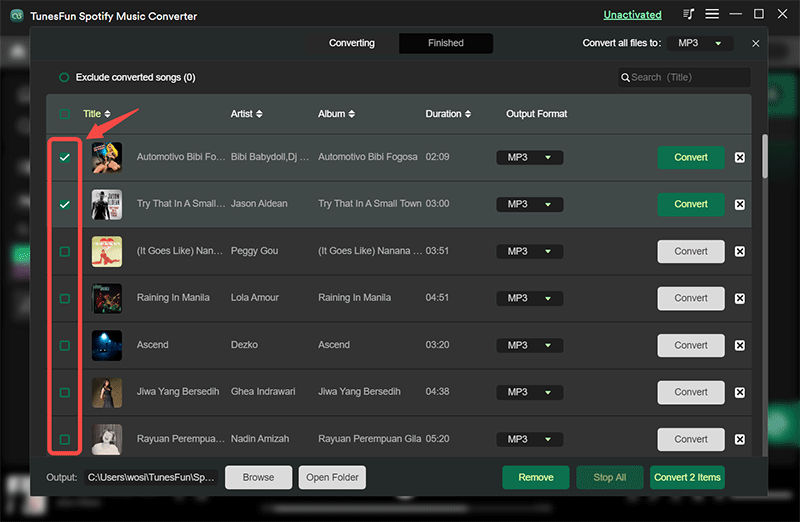
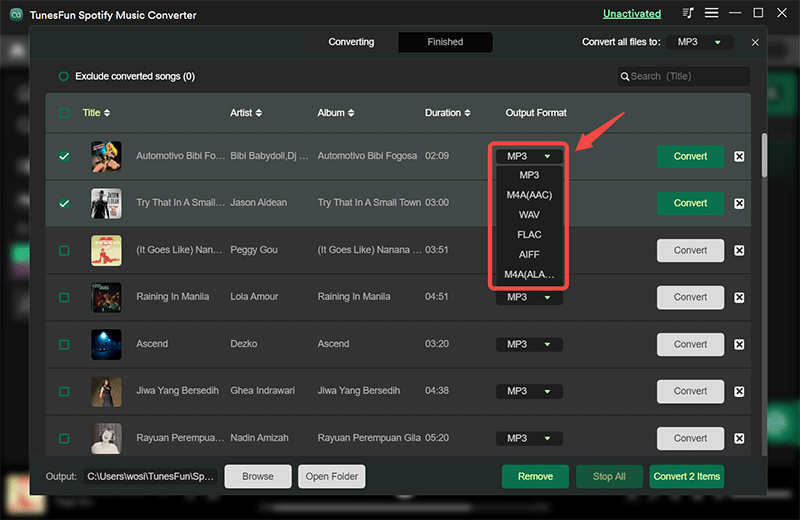
Step #2. Under the “Convert all files to:” menu at the top, choose your desired output format by tapping the “drop-down” arrow. At the top, specify the output folder to use.
Step #3. Click either the “Convert” or “Convert All” button. The conversion shall start then. While the conversion is ongoing, the DRM removal process shall also be done by the app.
Within a few minutes, expect that the selected Spotify songs will be transformed and that new tracks shall be saved to your PC. You should be able to keep them forever as they are already free from DRM and are converted.
Part 4. Summary
Finding out where to cancel Spotify premium is really vital as you can use this knowledge especially when you decided to just keep on using the app for free. Fortunately, the procedures can easily be done on computers and handy devices such as iOS or Android.
In the case of keeping your Spotify favorites, though you don’t have a subscription plan, it is good that you have a reliable app with you such as the TunesFun Spotify Music Converter as this is a good example of a tool that can help you with Spotify song conversion and downloading!
 Home
Home
Leave a comment